ocei77
Members
-
Joined
-
Last visited
Everything posted by ocei77
-
ocei77 replied to vladvv's topic in 1990 to Present Legacy, Impreza, Outback, Forester, Baja, WRX&WrxSTI, SVXunit may be bad, but check the small nipple on the bottom. It's easy to get clogged. Also the line that goes from the manifold to the egr unit itself. Another one that likes to clog. O.
-
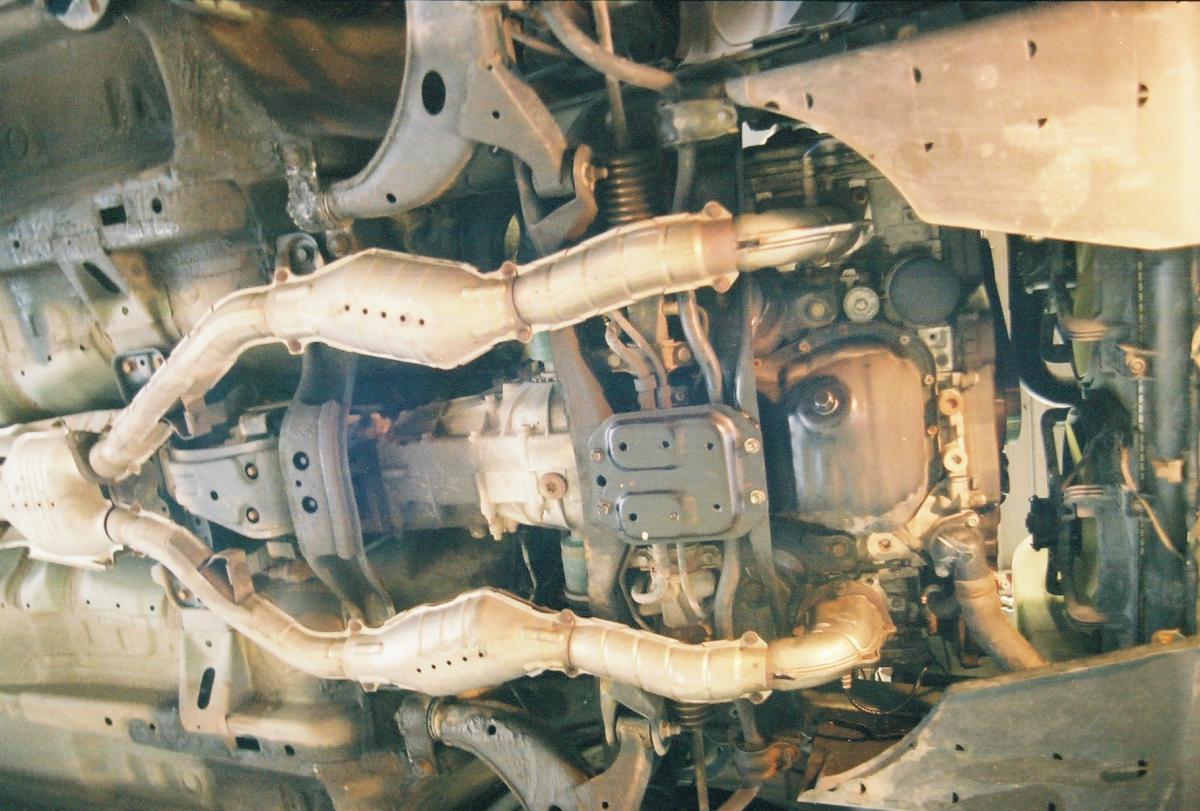
ocei77 replied to subiada's topic in 1990 to Present Legacy, Impreza, Outback, Forester, Baja, WRX&WrxSTI, SVXThe CA emissions 04 had 3 cats. One in each header line and a 3rd after the Y. Bank 1 is the passenger side. I would (and did) replace the front 02 sensor there. O/
-
ocei77 replied to noeln's topic in 1990 to Present Legacy, Impreza, Outback, Forester, Baja, WRX&WrxSTI, SVXCheck the TCU codes - if the AT Temp light flashes 16 times on startup then you have stored TCU codes. There is a 6 pin black connector above the gas pedal and two grounding wires wrapped into the harness directly above that. Insert one grounding pin into the center pin on the black connector (blue with yellow trace typically), then follow this process: 1: Turn ignition on, apply brake, and place gear selector in 1. Turn ignition off. 2: Turn ignition on. 3: Move selector to 2. 4: Move selector to 3. 5: Move selector to D. 6: Depress accelerator pedal slightly. 7: Read morse codes flashes on the AT Temp light. 24 will indicate a bad duty-c. These are "stored" history codes from previous drive cycles. 8: Turn ignition off, then back on. 9: Move selector to 3. 10: Move selector to 2. 11: Move selector to 1. 12: Depress accelerator pedal slightly. 13: Read codes again. Codes given here are current faults active in the TCU on the current drive cycle. GD Handshake method for reading TCU codes. From post by General Disorder. first section of pulses is the tens digit second is the units.ie two pulses , pasue then 3, is 23. O.
-
ocei77 replied to outback steve's topic in 1990 to Present Legacy, Impreza, Outback, Forester, Baja, WRX&WrxSTI, SVX1. replace the bent valves - it's actually really easy, the only hard part is getting the valve springs off/on, it's a real bear and no good tools available for these heads so it can be a pain. Tool is available but cost is $80 for the one shown. For occasional user it may not be worth the expense. With a little effort a homemade unit can be made. O. C
-
ocei77 replied to UMT's topic in 1990 to Present Legacy, Impreza, Outback, Forester, Baja, WRX&WrxSTI, SVXSorry, but I prefer to do my own nut busting.
-
ocei77 replied to UMT's topic in 1990 to Present Legacy, Impreza, Outback, Forester, Baja, WRX&WrxSTI, SVXCan't use a ratchet. Breaker bar with cheater pipe. Put screwdriver into rotor to keep it from turning. I wouldn't use heat because of the bearings. O.
-
ocei77 replied to Robepktt's topic in 1990 to Present Legacy, Impreza, Outback, Forester, Baja, WRX&WrxSTI, SVXhere is ref to FSM. Use the 97 one. http://www.main.experiencetherave.com/subaru_manual_scans/ Not sure if you have one or two bolts (14mm) on a 98. If not 2, the topmost bolt is only a sliding pin. Remove both, clean and relube when reinstalling. Need a c clamp to compress the piston back into the bore. A youtube search will have some diy's. O.
-
ocei77 replied to ibroad's topic in 1990 to Present Legacy, Impreza, Outback, Forester, Baja, WRX&WrxSTI, SVXMarvel Mystery Oil O.
-
ocei77 replied to mightGETaSUBARU's topic in 1990 to Present Legacy, Impreza, Outback, Forester, Baja, WRX&WrxSTI, SVXOne white goes to ground and the other goes to pin 38 on ecu., when mated. I can't say it's gospel, but I don't think it will matter which goes where, since there are no other circuits in between or connecting, except ground. For future ref:http://www.main.experiencetherave.com/subaru_manual_scans/ and http://opposedforces.com/parts/legacy/ O.
-
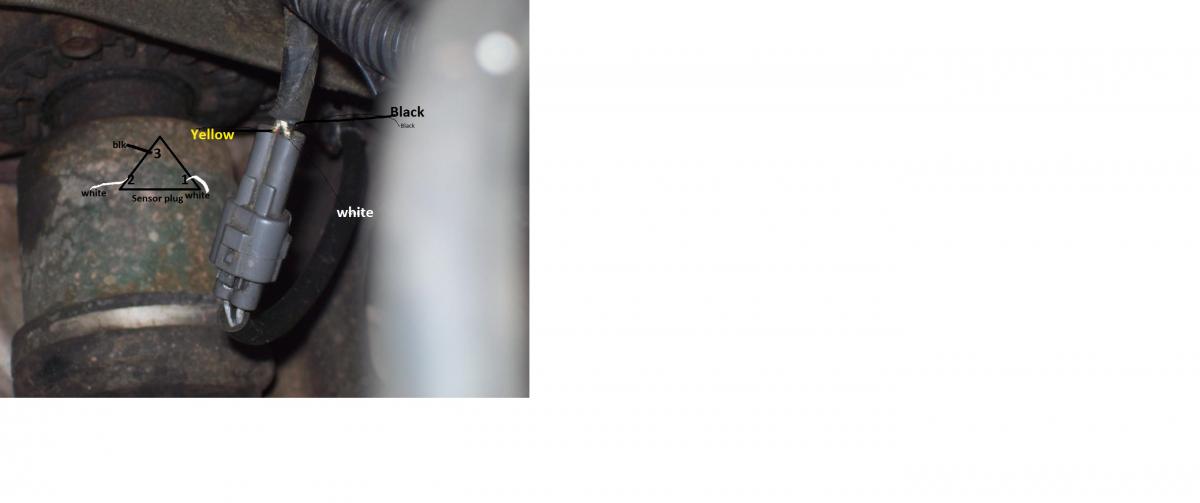
ocei77 replied to mightGETaSUBARU's topic in 1990 to Present Legacy, Impreza, Outback, Forester, Baja, WRX&WrxSTI, SVXif the plug side pulled, the white wires go to the top two pins. Black to bottom. They should still be in the correct orientation. O.

-
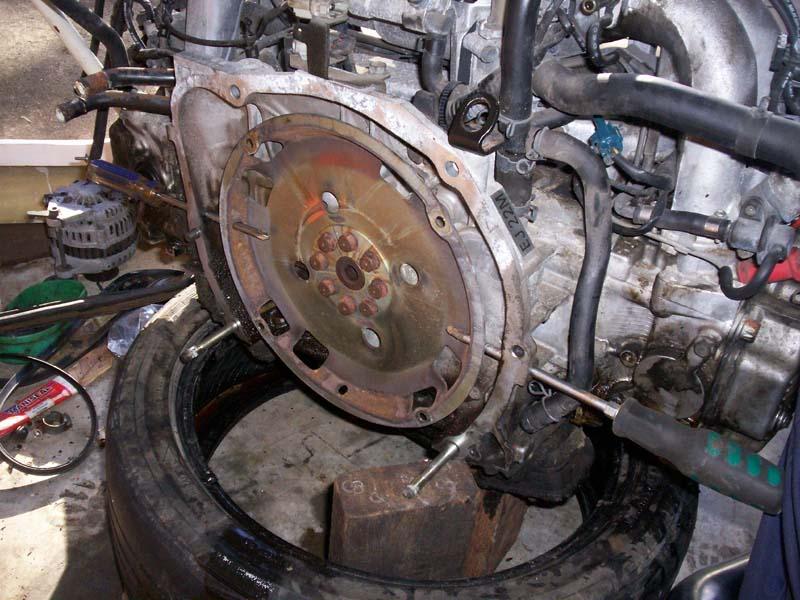
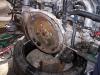
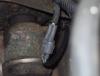
ocei77 replied to sonotchdlr's topic in 1990 to Present Legacy, Impreza, Outback, Forester, Baja, WRX&WrxSTI, SVX..... I can't find the picture I was going to link to. But midway down the side of the bellhousing is a small hole, about 10mm. You can put a large screwdriver through the hole and turn the crank until the screwdriver slides into one of the holes in the flex plate. Now the crank is locked and you can tighten the crank bolt. credits to Canubaru for pic O.
-
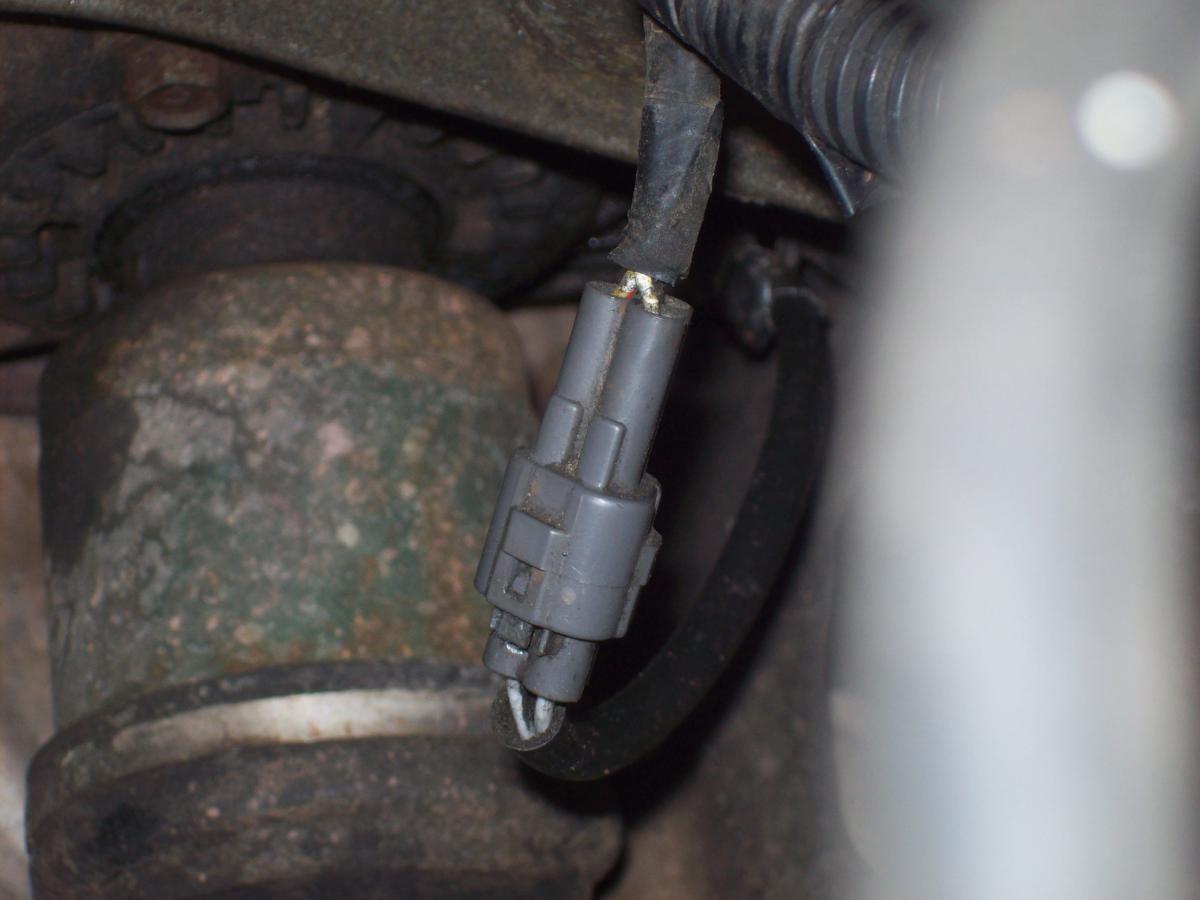
ocei77 replied to mightGETaSUBARU's topic in 1990 to Present Legacy, Impreza, Outback, Forester, Baja, WRX&WrxSTI, SVXI "assumed" the harness side pulled out. I will have to pull it in the morning and see what goes to where on the sensor side. O.
-
ocei77 replied to mightGETaSUBARU's topic in 1990 to Present Legacy, Impreza, Outback, Forester, Baja, WRX&WrxSTI, SVXNot a big deal. Sometimes they change wire colors between years. As long as the left wire on top is the white one, all else follows in sequence. O.
-
ocei77 replied to mightGETaSUBARU's topic in 1990 to Present Legacy, Impreza, Outback, Forester, Baja, WRX&WrxSTI, SVXThis is from a 96. Seems to be the same.. As shown with locking clip on top, Left is yellow with a red stripe, right is white and the bottom is black. O.
-
ocei77 replied to mightGETaSUBARU's topic in 1990 to Present Legacy, Impreza, Outback, Forester, Baja, WRX&WrxSTI, SVXWhich engine and what year? O.
-
ocei77 replied to BigMattyD's topic in 1990 to Present Legacy, Impreza, Outback, Forester, Baja, WRX&WrxSTI, SVX11044AA642. Use any online vendor for parts lookup numbers. also http://opposedforces.com/parts/ O.
-
ocei77 replied to MuddyFenders's topic in 1990 to Present Legacy, Impreza, Outback, Forester, Baja, WRX&WrxSTI, SVXFollow procedure for programming remote even though you don't have one . See http://www.cars101.com/subaru/keyless.html. Let car run. The battery must be charged. if it dies or is disconnected, you'll have to do it each time. Should fix the issue. O.
-
ocei77 replied to natext6's topic in 1990 to Present Legacy, Impreza, Outback, Forester, Baja, WRX&WrxSTI, SVXAfter looking more closely, the option given will not work for you. The header portion is much larger and a flange change alone will not mate the two pieces. This would work for the D but not the R version. Headers are available, but expensive. http://www.raptorsc.com.au/kits.php?id=70 For research see:http://legacygt.com/forums/showthread.php/header-h6-17345p2.html O.
-
ocei77 replied to toni1595's topic in 1990 to Present Legacy, Impreza, Outback, Forester, Baja, WRX&WrxSTI, SVXcan't find a ref pic of rear of block, but unless you see a lot of oil, more than an inch wide from the rear main, I'd leave it. The other plate is the access for wrist pins. there is an O ring in there. Some replace the O ring, others just ultra grey the unit. The upper left of the new metal plate should have an arrow next to bolt hole. This is where the special screw goes. O. Found a link. Engine is DOHC, but the rear is the same, just scroll down. http://www.rs25.com/forums/f105/t74366-tearing-down-ejxx-block-pictures-head-removal-splitting-block.html
-
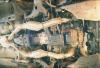
ocei77 replied to natext6's topic in 1990 to Present Legacy, Impreza, Outback, Forester, Baja, WRX&WrxSTI, SVXOption. Locate an 04 or 05 with Ca. emissions. This pzev used the exhaust headers from the H6 3.0, but with flanges to match the 2.5. Pic below is of an 04. O.
-
ocei77 replied to lmdew's topic in 1990 to Present Legacy, Impreza, Outback, Forester, Baja, WRX&WrxSTI, SVXSome of the 04 production for the Ca. emissions standards were pzev but not marked on the body as such. IIRC only the late 04 and some 05 were of this irregular (H6 twin header design) exhaust type. O.
-
ocei77 replied to natext6's topic in 1990 to Present Legacy, Impreza, Outback, Forester, Baja, WRX&WrxSTI, SVXAlternator 08-09 Legacy and 08-09 OB. AC Legacy 07-09 ,OB 07-09 All with H6 3.0 Dealer parts are over the top. see:http://subarupartsforyou.com/cp_partlistbymod.php?model=Legacy&subcat=Air+Conditioning+Compressor Link is iffy, but http://opposedforces.com/parts/legacy/ O.
-
ocei77 replied to CNY_Dave's topic in 1990 to Present Legacy, Impreza, Outback, Forester, Baja, WRX&WrxSTI, SVXTry Feder's Subaru, Middletown NY. 845 344-3100. Ask for Dave the Service Mgr. They have always been helpful. O.
-
ocei77 replied to jaredb3000's topic in 1990 to Present Legacy, Impreza, Outback, Forester, Baja, WRX&WrxSTI, SVXOnce the caliper bolts are removed there are two 17mm bolts that attach the bracket. PB and you may need a breaker bar. Make sure you use 6 pt sockets. You can hang the caliper from the strut spring. Rotors may be stuck, but gentle tapping should free it. If not, there are two threaded holes (8X1.25). Using a two inch length bolt will be enough to force the rotor off. Anti seize bolts and the center ring of the rotor on install. O.
-
ocei77 replied to gritle's topic in 1990 to Present Legacy, Impreza, Outback, Forester, Baja, WRX&WrxSTI, SVX^+1 If they find it hard to cut, just have them torch it til red, then a simple twist will take it right off. Tis why whenever I heat mine (not to red) I use a vise grip to hold the bung and a wrench on the O2. O.