TheSubaruJunkie
Members
-
Joined
-
Last visited
Everything posted by TheSubaruJunkie
-
Still, i wouldnt spend $173 on a real ring. -Brian
-
PN: 12033AA000 https://www.subarugenuineparts.com/oe_parts_cat.html Search there. Is this a mistake? Anyone out there know where some can be had alittle cheaper? -Brian
-
Your doing it right Jibs... just use a larger hammer. Just so you know, I remove the tie rod ball joint when I do my CV's too -Brian
-
a) OBD I A dime a dozen. -Brian
-
Jared, your webserver should have plenty of space and bandwidth to do what you want, without upgrading. It always sais I'm away... even when im here, so shoot me a message anyhow and if IM here i'll reply. If I see you hop on, i'll send one your way -Brian
-
There are plenty of free bbs software out there Jared, if you want to host your own BBS then contact me via AIM and i can help you get it setup. -Brian
-
Ive always driven the bearings out with a copper rod and a good hammer. When you are removing the old ones, dont worry about them and just push them out from the inside. There is a metal spacer between the 2 bearings, so once you get the 1st bearing out be prepared to catch and clean that part. Once you remove some grease from inside you'll see a bur in the center of the hub. This prevents the bearings from being pressed too far into the hub on each side. Remove the other bearing and clean the hub out. Obviously, this is alot easier with the hub assembly out of the vehicle and on a bench. After the hub is cleaned and all the old grease is removed, use new bearing grease and lube the inside of the hub, just enough to coat the walls of the hub. Also use a dab of grease and layer the outer race. Place the bearing onto the hub and center it, then lightly... and i mean lightly tap the outer race of the bearing evenly until the bearing starts to enter the hub. Once its started its just a matter of tapping it in. Avoid hitting the inner race of the bearing at all costs. One wrong slip and your new bearings will be worse off than the old. The copper rod comes in handy and makes it even easier. Make sure its all the way in, then remember to put the metal spacer in the hub before you install the last bearing. Use alot of grease. You shouldnt have to do that side again for another 60-80k -Brian
-
Ah thought so. Im gonna contact WJM and see if he has a part number. I think i remember talking to him about it in the past. -Brian
-
What are you using for an oil cooler? Ive been thinking it may not be a bad idea to get one. -Brian
-
Awesome. are you experiencing any pinging or detonation problems? Im worried about not tuning mine right when I get it built, and then blowing it up again -Brian
-
I think i have a manual somewhere i can look at. I'll see what I can find. -Brian
-
It made a good bit of difference on my EA81. Was a nice mod considering at the time I was jobless and still living with mom & dad. -Brian
-
Wow. I hope that poor 1600 isnt pushing those tires. -Brian
-
-Brian
-
Picture = 1,000words. If you dont do this, your struts will lock up when you try to turn. Use that special BFH. -Brian
-
This particular modification was done by using the map lights from a 1987 Subaru XT and putting them in my 1983 GL Wagon. I removed the map light setup from the donor car at the junk yard and brought it home and began thinking of a way to secure it to the roof of my car. The original map lights screw into threaded inserts welded to the roof of the XT. Any Subaru that does not have map lights as an option will not have these threaded inserts. Therefore I thought of an idea, and it proved to work. Here we see the map lights. In the center there is a single bulb that turns on by either the door, or the switch provided. On each side of the center light are single bulbs that can be turned on by the push of a button. This is the location at which I removed the lights from the XT, and plan on installing them on my GL Wagon. Because there are no threads in the roof of my car, I made a plan to fabricate a metal plate that would be long enough to extend 2" or more beyond the sides of the map light itself. Then I would screw the map light setup into the plate creating a clamp that would hold the maplight in place against the lining in my roof. Here you see the map lights without the plastic cover, and the metal plate I created to use as my clamp. Before I started the project, I put the map light against the roof of the car, and used a pen and marked the sides and the front and rear of the maplight setup. Then I used a box cutter (razor blade) and made an incision that was about 1/2" smaller in width & length than the map light setup. In this photo, you can see a small mark on the right side of the hole... that is the actual width of the map lights. You want to leave enough room for the light to secure itself against the roof lining... but make a hole that is large enough so the bulbs and the bottom of the maplights can fit safely inside the roof. For the metal plate, I used an old hacksaw blade. It was flimsy enough to bend and sturdy enough to hold the light into place once under pressure. I used the original holes in the maplights to mark where the 2 screw's would go, then used a drill and put a couple holes in the blade as seen in Figure 1. Then, as a added precaution I bent the blade so that it would put more pressure at the ends so that it would hold the light snug against the roof lining as shown in Figure 2. Before mounting the light, I had to run some new wires to the maplight setup. The plug that originally goes to the maplights has 2 wires, negative & positive. When I took the maplights, I also took the plug and a fair amount of wire along with to make sure I had enough to add more if needed. I used the original wires that goto the dome light, and spliced into those. Then ran new wire from the dome light to the new hole in the front of the car. In order for the map lights to work properly, you need to ground the hacksaw blade because the map lights use the mounting screw's as a ground to complete the circuit when the doors are closed. Here you can see the way it will be assembled. Figure 3 shows the roof lining, the map lights, and the way the hacksaw blade will be positioned. It was difficult to line up the hacksaw blade with the holes and then screw it in, but here is the easiest way I found to do it. Screw in one end, and leave the other end unscrewed. Then slide the unscrewed end into the hole until you have enough room to slide the other end of the hacksaw blade into the hole. Attach the plug for the wiring. Center the maplights and try to squeeze your fingers into the hole and bend the hacksaw blade downward so it is against the maplights... then try to align the hacksaw blade so the hole is in the correct position and then slide the screw through the maplight hole and into the hacksaw blade. When the screw is successfully in the hacksaw, remove your fingers from the hole... make sure the lights are centered and there are no wires in the way, and tighten the screw's. Figure 4 shows what the completed setup should look like. Screwing the maplights to the hacksaw can be a difficult procedure, but with alot of patience it can be done. I didn't ground my hacksaw blade, so my lights only work if the door is open. I will have to remove everything and solve that problem some other time. Here's a few shots of the finished project. Now I can finally see what that map really sais! -Brian
-
Ive come across 2 of these gems in the local junkyard. Both were in 2WD Hatchbacks one 1981 and the other 1982. Not sure what other years or models they came in but they allow you to install a standard DIN size stereo into any EA81 Subaru. This one I painted black to better match the interior -Brian
-
Here's a simple modification that can be done to your carburator: http://www.ultimatesubaru.org/forum/showthread.php?t=49976 I performed this mod to the HItachi 2BBL carb on my old EA81. The EA82 has a similar carb, and the mod can be performed to it as well. Make sure you use new carburator gaskets ( i believe i have a set Im not able to use since my car is MPFI, PM me if you want em ). Besides, new carburator gaskets should add at least 5hp, since they prolly leak -Brian
-
I've done this modification to my carburator with great results in acceleration and highway speed's. This modification may impact emissions results so if you need to pass emission tests in the future you might want to get a spare carburator from the Junk Yard to perform this operation on. NOTE: This modification will only work on the EA81 series Hitachi's. Although the same modifcation is possible for the EA82 Hitachi's, I have not performed it, or do I have images available for the modification. Just alittle background about this modification and the reason why I did this. The Hitachi carburator has 2 barrels, but only the primary barrel will open under acceleration. It is not until the gas peddle is fully depressed and a certain amount of vacuum is created in the intake manifold that the 2nd barrel will open up. This modification will bypass the vacuum actuator on the hitachi and force the 2nd barrel to open when the 1st barrel reaches 1/3 throttle. Lets Get started shall we? Here are some diagrams of the part of the carburator we will need to play with. You will not have to dissasemble the carburator at all, so almost anyone should be able to do this mod. Here in this figure we see the diaphragm that will need to be removed. It is held on by 3 screws (#2 in the diagram) and is also held on by the snap ring at the end of the diaphragm arm. You will want to plug the hole in the carburator that the diaphragm connects to. After you have the diaphragm removed, play around with the carburator alittle and notice how there is a lever for the primary and the secondary barrel. Here is a closeup of the moving parts that we will play with. #3 in the diagram is the actual throttle lever that connects to the throttle cable. #4 is the secondary lever that we need to make move. I've put red arrow's on the contact point where we need to atatch the primary and secondary plates. I have heard of people welding it together right there, but I dont have a welder, nore do I like that idea all too much. I took a piece of coat hanger and cut off a piece about 4" long and bent it to the desired shape. Here you can see how the wire should go. It might take alittle time in order to get it just right. Here are some pictures of the actual modification on my carburator: And here are some short movie clips of the modification in action: [ Movie #1 ] [ Movie #2 ] Both movies are under 500k in file size, so it wont take long to download them. --- Additional Info: Throttle responce is iffy. It actually creates a huge dead spot when you step on it. Because you are forcing the secondary open, the jets arent primed and you end up sucking in alot of air, with no fuel. Only until the jet for the secondary gets fuel, then everything's a go. Power is felt past 1/3 throttle when you step on that. If done right, you can rev the engine alittle and get the secondary to open up, force the jet to prime. Then when the light turns green dump the clutch and romp on it... seems to accelerate alot better than stock. But if your just cruisin everyday driving, the dead spot can suck if your not expecting it. I suggest doing this to a spare carburator. I did it to a junkyard carb and swapped back and forth between the 2. -Brian
-
***edit on Nov 4 2014*** Apologies for the missing images. Im almost certain I have these images somewhere and will make an effort to retrieve them and re-post them with this guide. -TSJ Installing Rear Disk Brakes All Non-Turbo Subaru's come equiped with rear drum brakes... while all Turbo EA82 Subaru's come with rear disk brakes. Wouldn't it be nice to swap those ancient drum brakes with some nifty rear disk's?? Well, you can Even your EA81 Subaru can use the rear disk brakes off of any EA82T Subaru. I recently did the conversion, and here's how its done. First off, lets tell you where to find rear disk brakes. Pretty much any turbo Subaru built after 1985 will have rear disk brakes. You can use these rear disk brakes on any EA81 and EA82 Subaru. If your Subaru is 4WD, you will need the rear disk brakes off of another Turbo 4WD Subaru. If your Subaru is 2WD, you will have to find rear disks off of a 2WD Turbo Subaru. I found my rear disks in a junk yard on a 1986 Subaru XT Turbo Coupe. Any Subaru RX, XT Turbo, GL-10 Turbo (both wagon and sedan) will have rear disk brakes. Next, lets go through the tools you'll need to remove and install your rear disks. 1) 14mm socket 2) 14mm wrench 3) 36mm socket 4) Socket Wrench 5) Hammer 6) 10mm wrench 7) Plyers (needlenose prefferably) 8) Flat Head Screwdriver. 9) Breaker Bar (long piece of pipe for more leverage) 10) Jack & 1 Jack Stand The parts you need from the donor car are the Disk Rotor, Disk Caliper with the flexable break line attatched and the backing plate that the caliper mounts to. <-- Parts Let's Get Started! First, if the car is on the ground, use the screwdriver and your pliers to straighten out the cotter pin. Then remove the cotter pin from the spindle. *tip* I use my pliers, and grab the rear of the cotter pin, right between the loop. Then I take my hammer and gently tap the pliers and the cotter pin should tap right out. After you have the cotter pin out, use your 36mm socket with the breaker bar and break the nut loose on the spindle. Do not remove the nut just yet. Then go ahead and break your lug nuts loose. Use your jack to raise the car and support it with your jack stand. NEVER work on a car that is supported by just your jack (or cinder blocks, 2x4's or wooden planks!). Always use a jackstand! After you raise your car, go ahead and remove the tire and then remove the 36mm nut. Make sure you keep the nut, washer and cone-washer as well. Sometimes the cone washer wont want to come loose, use your hammer and gently tap the spindle and the sides of the rotor until the cone-washer pops out of place. Now you should be able to remove the drum and expose the mounting bolts. Remove the 3 bolts on the inside of the drum, holding the drum to the trailing arm. You will need to use a 10mm wrench to loosen the metal brake line. Take care not to strip the 10mm nut on the line, or break the line itself, you will be re-using it. Clean as much of the brake dust off of the hub assembly. Remove the drums from trailing arm by rotating it and tapping the backside with a hammer or mallet. Once its removed it should look like this. Once you have everything cleaned up, you should be ready to install your disk's. All the hardware is the same, bolt the backing plate onto the hub. Once that is done, you will need to install the rotor. You must do this before you install your caliper. Its not neccessary to torque the castle nut just yet, just fit the rotor in place. After the rotor is on, you can install the caliper. Bolt the caliper bracket into place, and slide the caliper into its bracket. After youve installed the brake pads tighten the caliper and everything and attatch your metal brake line to the rubber line leading from the caliper. You might need to bend the metal line out of the way. Make sure its safe from being pinched or crushed. Repeat the process for the other side.When you install your rotor, make sure to use the cone washer, then the flat washer, and torque your 36mm nut to 145lbs. Install the cotter pin, i find nails work just as well You may want to bleed your brakes afterward, then take the car out for a brief test drive. Good Luck & Have Fun, -Brian
-
Awesome Dave! You better get a shot when it rolls over 300k, no excuses. Although, doin donuts in a parking lot is a pretty good excuse. With all the rain we've been getting here, its not hard for me to get alittle fishtail action going in the jeep. But it makes me miss my subaru even that much more. -Brian
-
Ok cool... keep me informed, you have my AIM. Feb is cool, i can wait -Brian
-
Hey Noah... are you still in SD? When do you make your trek up to Seattle? You taking I-5 the whole way? Let me know, cause im sure you'll be passing through here, and it'd be cool to meet up for some lunch or dinner, depending on what time you roll through. -Brian
-
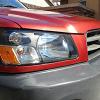
Yeah i doubt any Legacy rotor will bolt to a GL10, unless youve done the 5lug swap. -Brian
-
Here's some closeups of the mounting hardware. Its mounted to my gutters. EA82 gutters are different, so maybe Noah can get some pix of his since his is an EA82. -Brian