
Ionstorm66
Members
-
Joined
-
Last visited
Everything posted by Ionstorm66
-
-
I did my front struts with the second gen KIA springs. Fit like a glove. I did notice my new struts are longer. The old ones are the original Subaru 4WD, and new ones are 4WD Gabriel
-
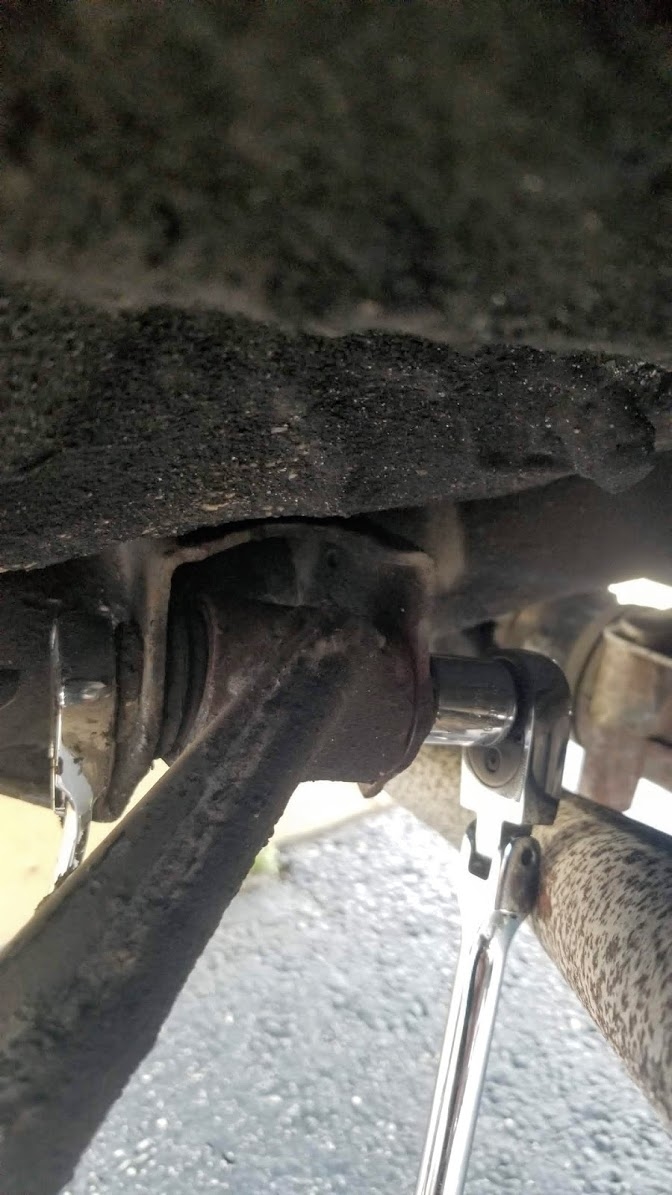
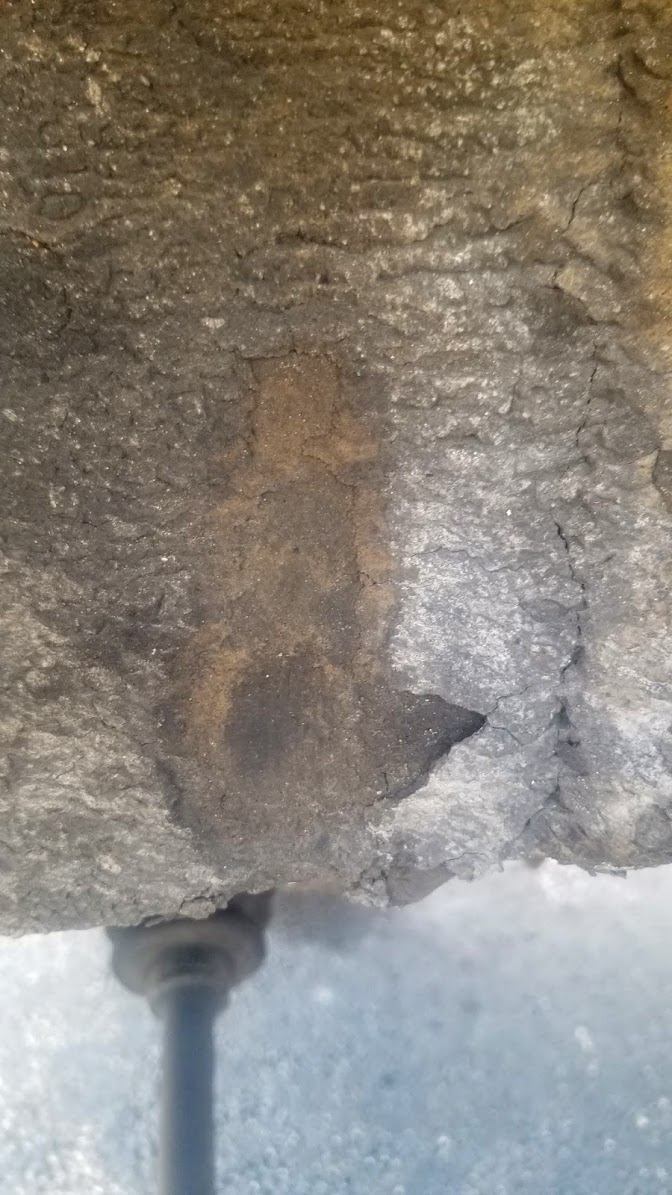
Got everything swapped over and it's all good now. My bushing were totally shagged out. I also trimmed the spring perches on the rear struts just to be sure. You can see the undercoat on the perch. Here is all the rubbing that was happening. When I was on a corner, and hit a bump the perch was going under the lip and slamming. All the rear bushings looked like this. This is with the car off the ground, so it had to get worse with some weight.
-
Not the best fix but you can refurb crush washers. Anneal them by heating cherry red and dropping in a bucket of water. Then use sandpaper on a flat surface like plate glass, and flatten both sides.
-
-
Part 10 is the rear subframe/trailing arm mount. I know the round hole in the front has a rubber bushing like the mustache bar/diff brace. Maybe ea81s are different, but there is no way to use a strip of rubber to replace the bushings on a ea82 mustache bar. That are a pretty standard shaped bushing. Round bush with flared ends.
-
If the pinouts are different you can take the extra connectors from the harnesses you are using and make an adapter without having to modify the ones you're using. Take the light side from the 86 and body aide from the donor. Make any wiring change you need between the two, and connect it in the middle.
-
Is there anything I can use to replace the bushings on the rear subframe? I replaced all the control arm and diff bushings. The ones on the subframe are shot, and the subframe just sits on the body It lifts off the body over a half inch of I jack the car up, which means it's moving around while driving.
-
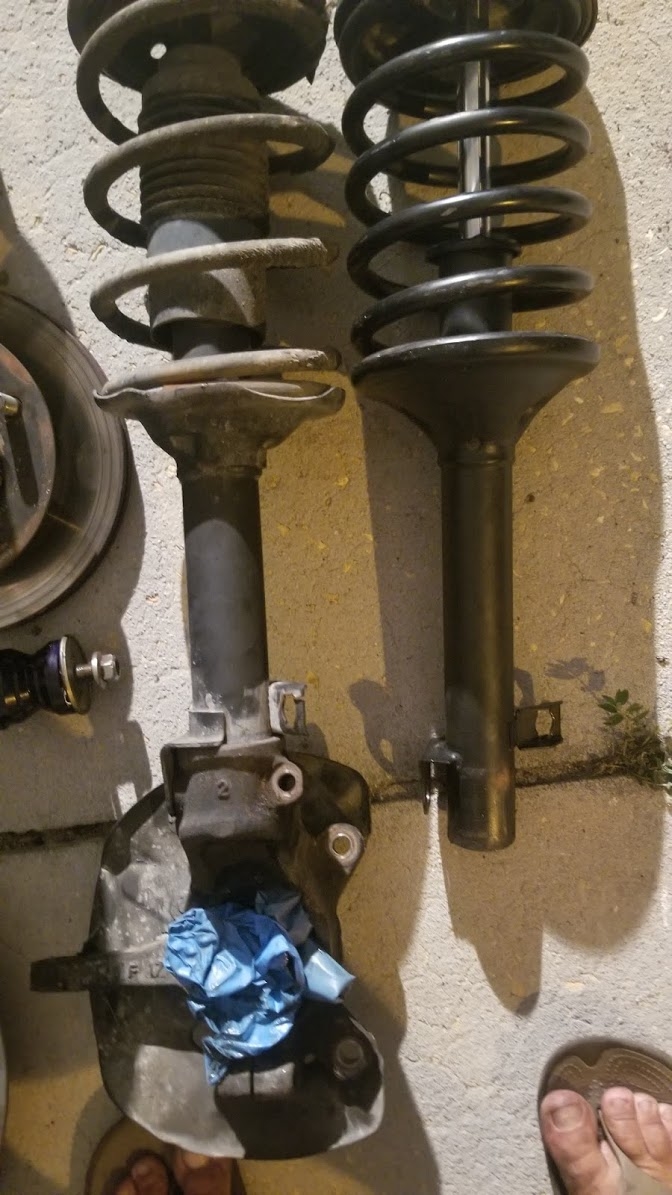
It isn't a issue with the shock, they are the same length as the stock ones for spring perch to top mount. It's the springs. Uncut they coils are touching each other when installed. This makes it impossible to remove the compressor.
-
If there is a vacuum line going to the FPR disconnect it and plug the engine side vaccum line. Did you hook up any of the EVAP system if the car has it? If so do the same for it. After those two it has to be injectors. Did the oil smell like fuel before you tried to start it? If so then leaky injectors. If not ecu is flooding for some reason, pull codes.
-
Tire wear was not terrible. Just burnt the outside corners off.
-
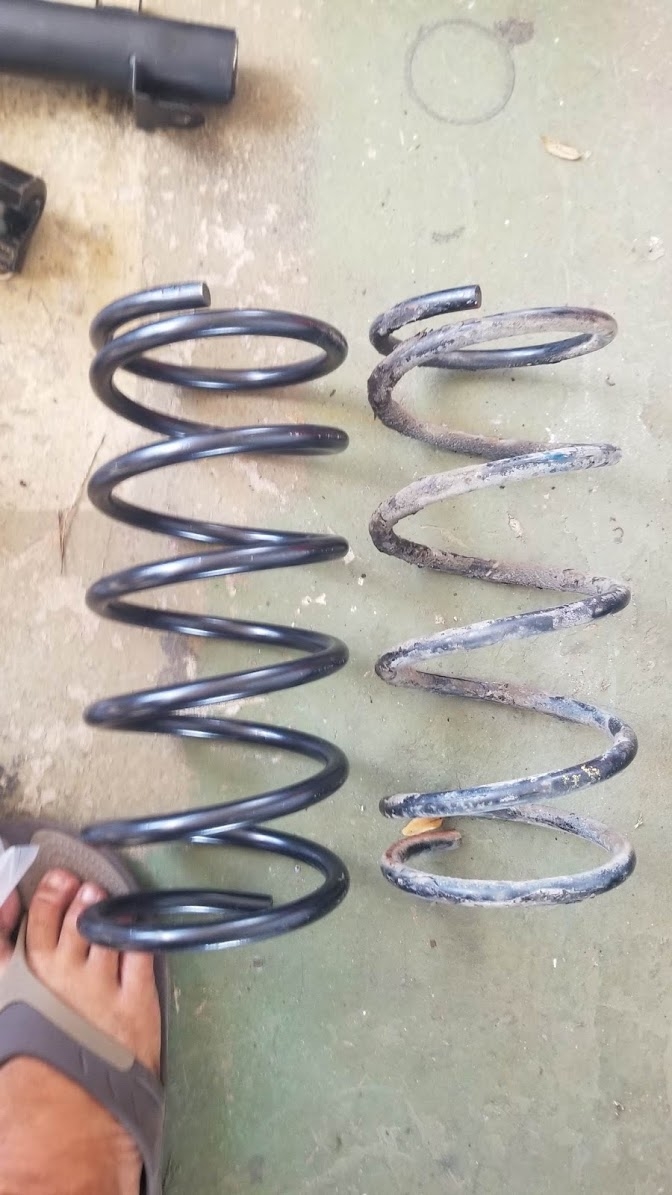
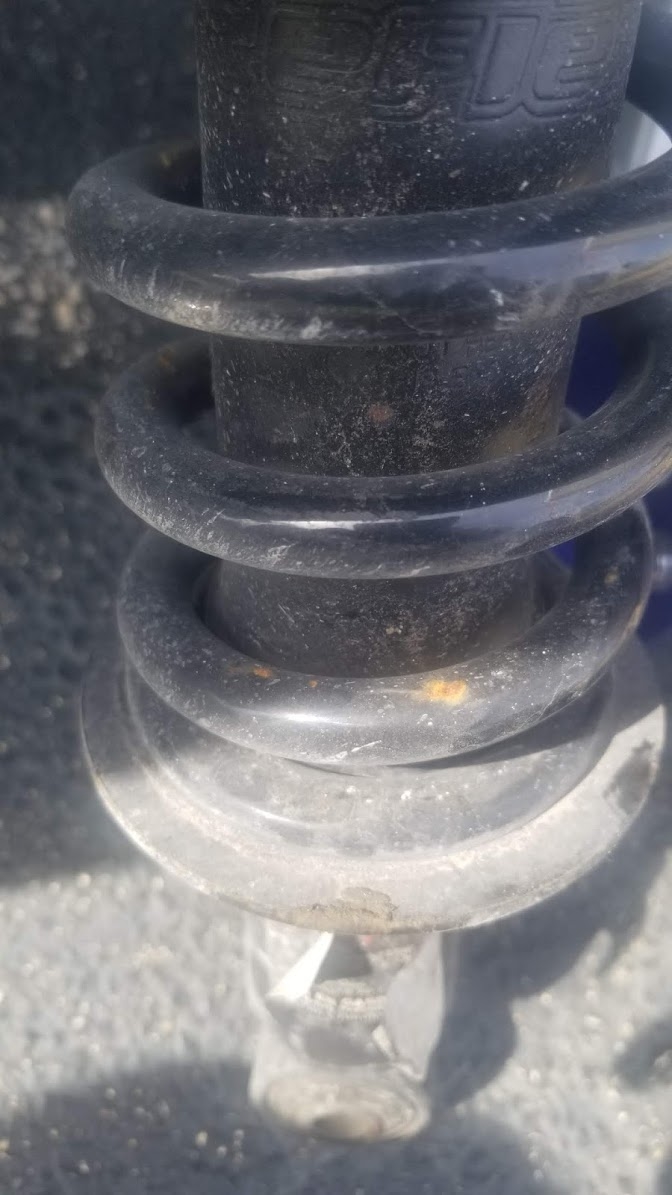
Idk how y'all are missing the face that the cut springs are the same length as the stock springs. The Accord springs have a longer uncompressed length than the stock ones. I only cut 1.5 coils off, making the same length. If I didn't cut the accord springs they were impossible to install on the Toyota struts. After compressing the springs and installing on the strut, there isn't enough room between the coils to remove the compressor. I guess I didn't really explain that correctly. So unless I wanted to scrap a compressor for each strut, they would never of worked uncut. Also the springs and struts ARE NOT bottoming out. The spring perch was hitting the body because the bushings were clapped out. After replacing all 4 rear control arm bushings the slamming is gone. I will post some pictures later of the damage to the body from the spring perch.
-
Also to add to the cut springs. Cutting the spring dose lower it's total weight capacity. They are rated in pounds per inch of compression. Taking a stock spring and cutting it to lower a car will result in it bottoming out on every bump due to the lowered weight capacity. Taking a longer, stiffer than stock spring, cutting it down is not the same. The stock springs are 196 lb/in, the accord springs I used are 279 lb/in. Stock springs are 12 inches, accord 13, cut to 12. My cut springs are the same free height as the stock springs, but 70% stiffer! Of course they will give you a worst ride if the car weight isn't enough to compress them, but my travel is the same as stock.
-
The springs aren't bottoming out. They aren't fully compressing, and the bump stops aren't being hit. The struts aren't bottoming out either. Cutting a spring only worsens the ride when they bottom out. What actually was happing is the bushings were 100% clapped out. This was causing the bottom spring perch to hit the body, because the agliment was super super cambered in. I have replaced every bit of rubber in the suspension with superpro polys. It's amazing how much better the car feels.
-
The parts are brand new, bearings feel fine.
-
The loyale ones are different. The is a cone shaped steel mount that bolts to the car, and the rubber fits inside that. There is no way for the rubber cone to go through the steel mount into the hood. It could become unloaded, and fall downwards.
-
The stock ones and the aftermarket ones have not metal in them. It's just rubber, which is why I am trying the window weld.
-
Talking about the front strut mounts. They were like that in the box. Looks like they didnt get a good bond when they were made.
-
So doing my front struts, and both of the new strut tops are seperated. The top of the mount is not attached to the rubber. Can't get replacements until next week. I'd hate to reassemble with the old tops, only to pull it back apart. Thinking of just smearing some windshield weld in there, think that will attach them?
-
So after 6 months something is definitely wrong in the rear end. The handing is very poor, and on anything other than a minor bump it slams in the back. It isn't hitting the bump stops. I chalked them and got no transfer. I think either the springs are compressing fully and binding, or the struts are bottoming out. Don't really know how to check for either, but it's worst than the stock setup hitting the bump stops.
-
Frame? What frame, its unibody. That is where you are supposed to jack from. You need a pinch weld adapter for most floor jacks to lift from there, they are about ~$20. Or you can get some 1/4" wall 2" square tubing and cut a notch in it. Don't forget to get adapters for your jack stands too. Most hack shops just jack on the pinch weld and roll it over, right on the rocker and dent that, or worst yet on the oil pan/diff.
-
My passenger rear spring started running the body after I put it all back together. I scribed the alignment section of the arm, so it's back where it was. What else could cause it to get closer to the body?
-
Managed to get the drum off. I'm thinking best course is to pull the nut off the back of the hub and just try and press the brearings and stub out as one. Then cut the brearings of the stub, and grid down the end so the nut will clear.
-
Car is from new hampshire. Lucky the under side has about 1/2" of rubber under coat from the PO so no rust there. But everywhere that isn't coated is rusted. Takes ages to free up nuts and bolts. I already almost runied the threads trying to free it up. I'm almost at the point of pulling the trailing arm and pressing it out.
-
Slide hammer didn't get me anywhere, just wanted to pull the car off the lift. Dose the stub axle pull out or push in? I have the cv axle removed so it should come out of the bearings.

