Search the Community
Showing results for tags 'Weber'.
-
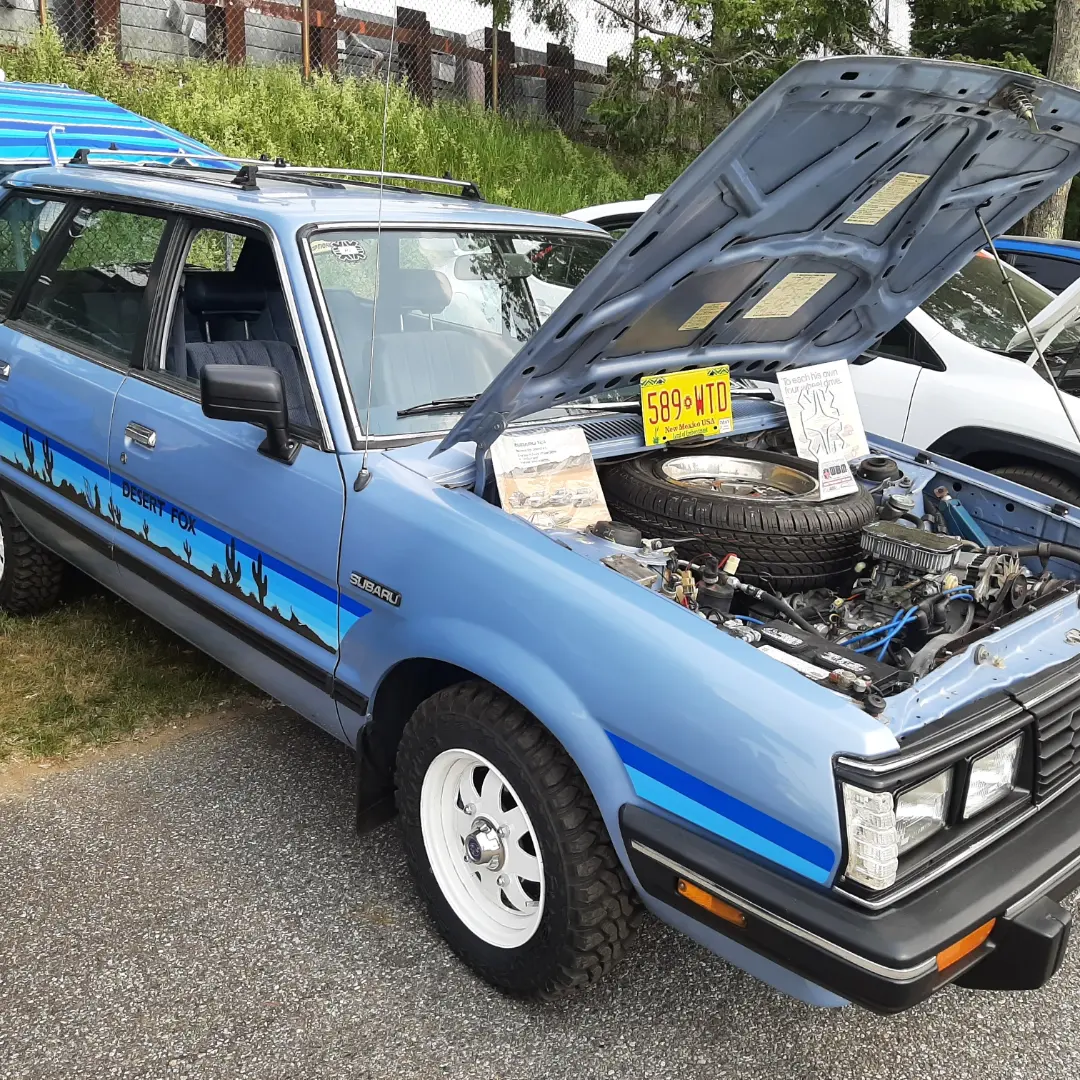
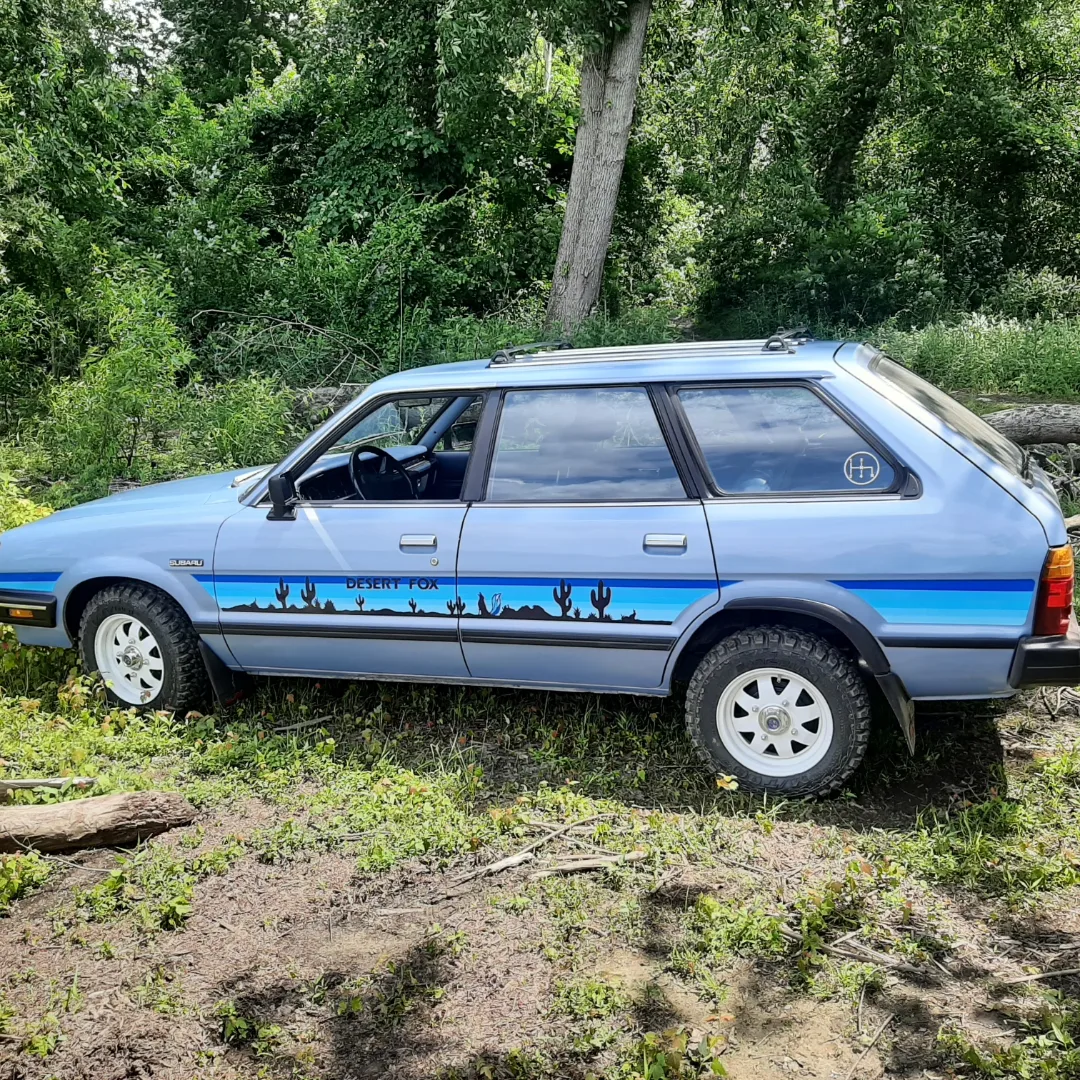
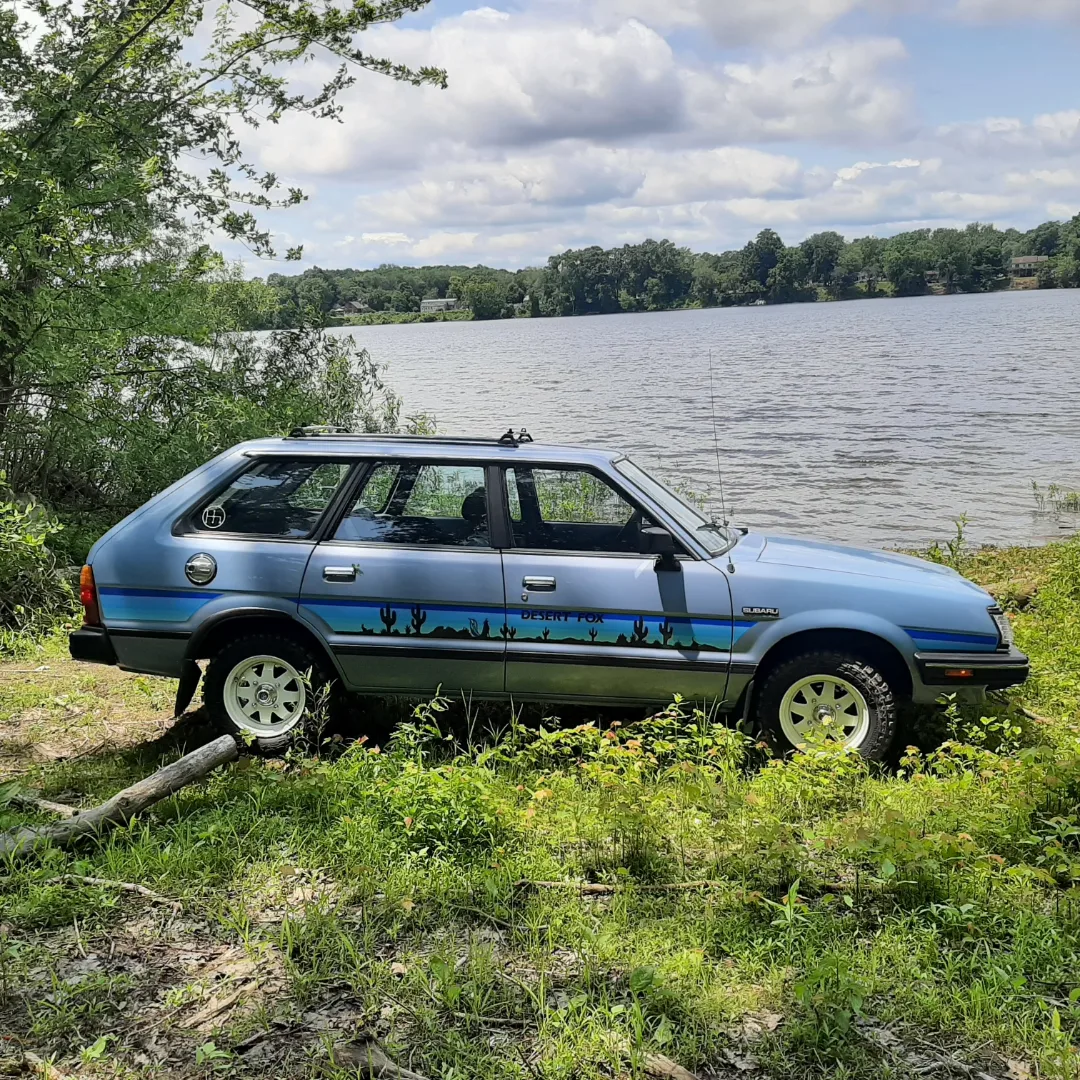
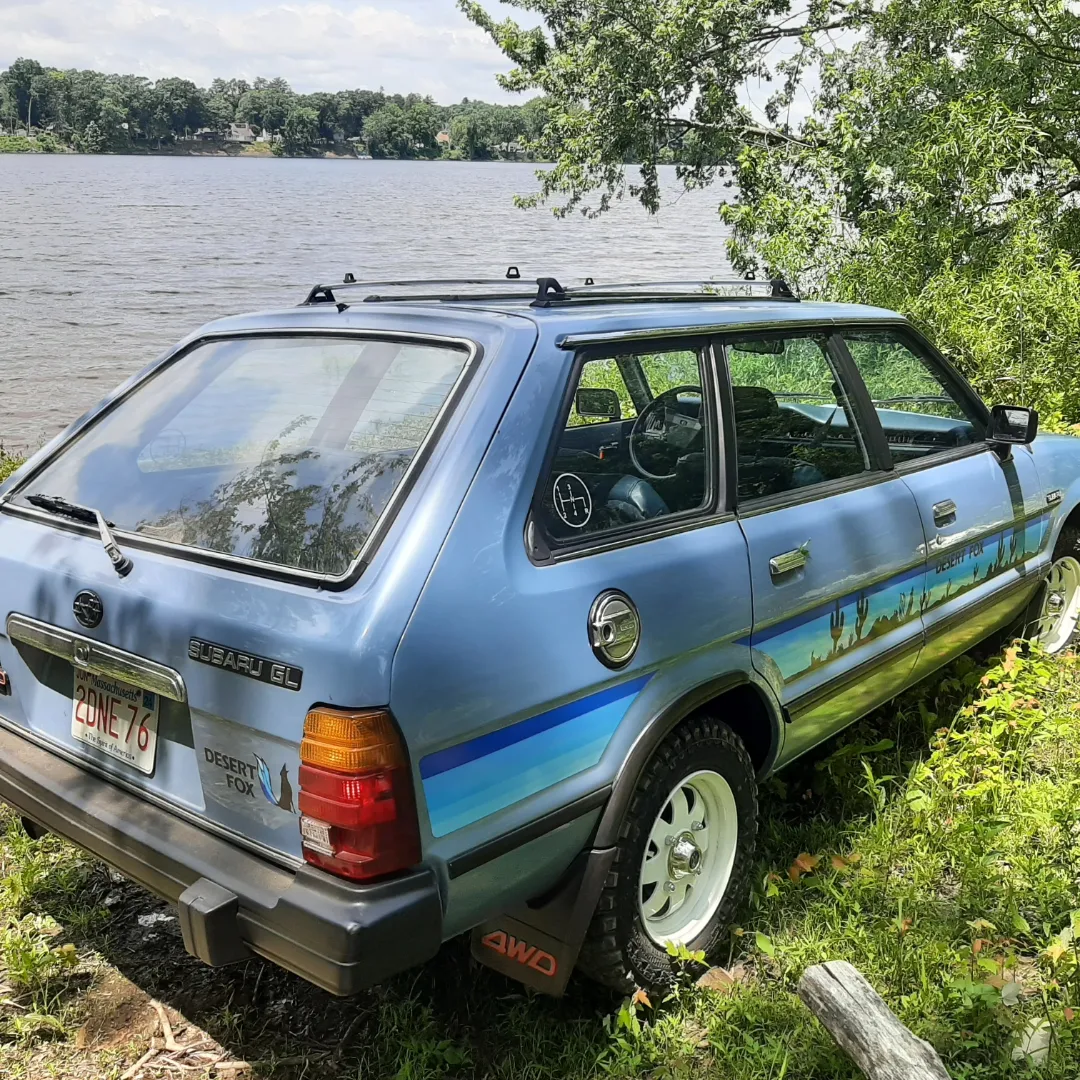
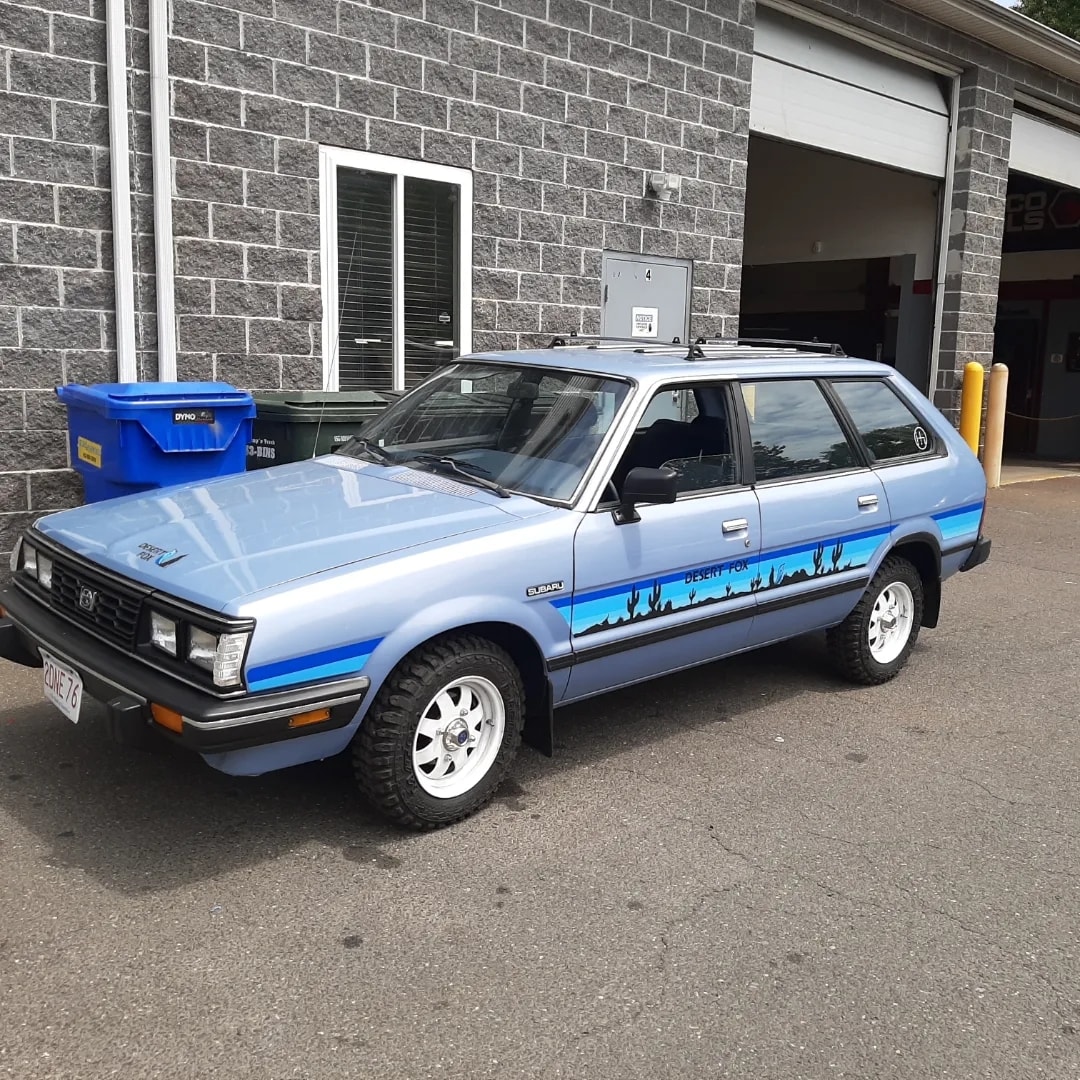
Meet Harold, our 1984 GL wagon. Highly original survivor originally from New Mexico. Dual range four speed, ea81 with a Weber.
-
 Hi all, I've been using this forum for the last month to try and figure out for to get my 1983 Brat GL running. I recently rebuilt the Ea81 it came with and swapped the hitachi carb for a Weber (new). There are some rust issues with the car but the engine is in great shape. I've got the engine back in the car and it'll fire up with starter fluid sprayed straight into the carb. Tuned the fuel mixture, set idle, timing, etc. Now the issue is, if I detach the fuel line going straight to the carb and run the fuel pump, fuel comes out of the line and flows nicely. However, when I attach the fuel line to the carb and run the pump, it's like there is no pressure at all. No fuel runs through the forward fuel/vapor filter. I hear the pump running but fuel doesn't fill the filter. Could it be an issue with the float? Or possibly the Weber filter underneath where you attach the fuel line? Or a pressure issue? Do these carbs need a return line? Would really appreciate everyone's ideas and replies in advance. I've worked with the carb on my motorcycle (dr650) but other than that I don't have too much experience with carbed Subarus.
 -
Okay, bear with me as this is my first write up, but here are the simplified steps to converting an EA81 from a Hitachi carburetor to a Weber carb... feel free to add anything i missed, and as always, referr to Jezek's thread if you dont find what your looking for here. EA81 Hitachi to Weber 32/36 Conversation NOTES: These instructions are for a no AC, non power steering 1.8L EA81; variations may apply to those engines equipped with said add ons. The author takes no responsibility for misinterpretation of these directions and the consequences thereof. These are general guide lines that apply to all older Subarus equipped with the 1.8 liter EA81 engine. However, most steps will apply to the EA82 engine. There are some unique differences between the EA82 and the EA81, so if you're doing a swap on an EA82, please go to JesZeks thread here:http://www.ultimatesubaru.org/forum/topic/71510-ideas-on-swaping-a-weber-carb-on-ea82%C2%B4s/ Even if you are doing a swap on a EA81, I highly recommend looking at his thread, as he includes things which I have not covered in this write up, such as fabricating and installing a free flow muffler. Terms: PCV = Positive Crankcase Ventilation valve. The PCV vents harmful gasses away from the engine. It is found on the backside of the intake manifold next to the EGR. EGR = Exhaust Gas Readmission valve. The EGR is an emission valve used to recirculated unburnt fuel vapors from the exhaust ASV = Air Suction Valve. A useless emissions system that is supposed to suck cool air from the air box into the catalyst converter. It is easily identified by the large plastic silencers that attach to a shiny pipe that screws into each head. 12V Ignition Source: Any wire that has no more than 12 volts running through it when the ignition is on. Throttle wheel: This is the part that the throttle cable (cable that goes from gas pedal to carb) hooks onto and controls the carburetor linkage shaft, which controls the butterfly valves, which ultimately controls the amount of fuel/air that enters the engine. You will need: 1) Weber 32/36 DGEV Carburetor 2) Single Piece Adapter for EA81 3) Weber throttle cable bracket 4) Assorted rubber vacuum caps 5) JB Weld 6) Metric socket set and wrenches 7) Vise grips 8) Two quarters (.50 cents) or equivalently sized change or metal 9) A cutting device of some kind (hacksaw, Dremel, Sawzall, metal bandsaw, etc.) 10) Hitachi throttle wheel and washer 11) Nitrile/chemical resistant gloves 12) Carburetor cleaner/rags 13) Hose clamps 14) 4ft of 5/8" diameter rubber heater hose tubing 15) 1ft of 3/8" diameter fuel hosing 16) 1ft of 5/8" diameter vacuum hosing. 17) 5/8" plastic tee with a 3/8" contour CRITICAL THAT IT HAS A 3/8" CONTOUR!! 18) Drill with 1/2" drill bit 19) A few electrical connectors 20) Optional: Torque wrench, hi temp gasket maker, multimeter, egr Delete plate Install preparation: It is recommended that you replace the following in preparation for your Weber if they have not been done recently: spark plug wires, spark plugs, (use only NGK on both), distributor cap, distributor rotor, (be sure to use dielectric grease on all the connections), check battery and replace if old, check timing, if a solid lifter engine tune the valves, and change both fuel filters. I also personally HIGHLY recommend that you replace the throttle/accelerator cable, because after plus or minus 30 years, the plastic sheath that encases the cable has a tendency to crack and break when moved to its new location. In order to achieve maximum performance from your carburetor, you must take the throttle wheel off of your Weber and install your Hitachi's throttle wheel in its place. to do this, gently remove the nut on the Hitachi and the Weber and wiggle the throttle wheels loose on each carb and remove them. Take the washer that was on the Hitachi shaft and place it on the Weber shaft, (apply a tiny bit of grease on the washer before install) Then slip the Hitachi throttle wheel on shaft and re-tighten the shaft nut. WARNING! DO NOT OVER TIGHTEN NUT!! LINKAGE BINDING AND SHAFT DAMAGE MAY OCCUR!! To prevent this, tighten the nut until it is finger tight, then tighten one more flat of the nut with your wrench. Check the linkage for binding by working the shaft with your hand. If there is binding, loosen the nut and reinstall it at an even lower torque. Your Weber will still run without the hitachi wheel, but the Weber wheel allows for only enough travel for the primary carb barrel to open. This means you are losing roughly 40% - 60% of your possible power. Accelerator Cable P/Ns 4WD Models with EA81: PIONEER CA8609 ATP Y639 Non-4WD w/ EA81: BECK/ANRLEY 0950494 INSTALLATION INSTRUCTIONS Removing the Hitachi1. Remove Hitachi Carburetor and all associated vacuum hoses2. Plug all Hitachi vacuum ports and remove unnecessary metal lines beneath intake manifold. 3. It is highly recommend that EGR be removed and plugged. Here is the P/N for a delete plate if you cannot make one yourself out of aluminum. P/N: R66M-70978 4. Plug the carburetor coolant passage in the intake manifold with JB Weld. 5. Plug the coolant line leading to intake manifold with JB weld a cap with vacuum cap to ensure a tight seal. (The inlet is found on the metal pipe that leads to the water pump; it should be directly under the alternator.) Positive Crankcase Ventilation (PCV) Setup Link to 5/8" tee with 3/8" conture: "https://www.finditparts.com/products/596808/dorman-47147?srcid=CHL01SCL010-Npla-Dmdt-Gusa-Svbr-Mmuu-K596808&gclid=CjwKEAiA79zDBRCgyf2FgeiY-CESJABzr0BMo_otGbsQpbhMdDjmHM3Cs_I-O0hmXJbpxDmXr_fndRoCPsrw_wcB">https://www.finditparts.com/products/596808/dorman-47147?srcid=CHL01SCL010-Npla-Dmdt-Gusa-Svbr-Mmuu-K596808&gclid=CjwKEAiA79zDBRCgyf2FgeiY-CESJABzr0BMo_otGbsQpbhMdDjmHM3Cs_I-O0hmXJbpxDmXr_fndRoCPsrw_wcB This can be found at any auto parts store... the link is just so you have a picture for reference. 6. Route the PCV line from the RIGHT head (drivers side) to one of the 5/8" sides of the chamfered tee. 7. Connect the other 5/8" end of the tee to the PCV valve. 8. Drill hole in the bottom air box plate big enough for the 3/8" hose or a fitting to hold the hose. (I used a 1/2" threaded plumbing fitting with a 3/8" barbed hose adapter) 9. Connect the 3/8" end of the chamfered tee to the bottom air box plate using the 3/8" hose 10. Connect the LEFT (Passenger side) 5/8" breather hose to the provided 90 degree tee that comes with the kit. This tee should be secured to the predrilled hole in the bottom of the airbox Mounting the Weber 11. Clean off intake manifold and adapter mating surfaces using carburetor cleaner and rags (use 320 grit sandpaper if necessary) 12. Optional: coat mating surfaces and gasket in JB weld before installation. This will eliminate any chances of vacuum leaks and after all, youre not going to need to take off this adapter again unless you want to go back to the hitachi for some weird reason. A and if you ever need to transfer the carb to another car, a few blows with a soft faced mallet should break it free. 13. Mount adapter plate on intake manifold. Tightening in criss cross pattern, torque the 8mm hex bolts to 12 ftlbs or until reasonably tight. (Recommended use of blue thread locker) Note: some members have welded their adapter plates on to completely eliminate vacuum leaks. If you are confident in your TIG welding abilities or know a good welder, this is certainly an option. 14. Screw the large studs into the top of the adapter (DONT USE THREAD LOCKER ON STUDS!!!) 15. Make sure carburetor and adapter mating surfaces are clean and dry. UNDER NO CIRCUMSTANCES SHOULD YOU USE JB WELD ON THESE SURFACES. USE JB WELD ONLY ON THE ADAPTER/INTAKE MANIFOLD SURFACE... NOT THE TOP OF ADAPTER TO CARBURETOR SURFACES. 16. I personally don't recommend coating the carburetor-to-adapter gasket with any kind of gasket maker/sealer... in my experience with carb gaskets, they cause more leaks than they prevent 17. Remove the brass "Y" shaped fuel inlet from the Hitachi carb and install on Weber carburetor. 18. Mount Weber carburetor on studs. 19. Mount throttle cable bracket on rear studs. 20. Tighten nuts on top of spring washers in criss cross pattern. 21. Mount the bottom air box plate to the weber and secure with provided bolts. 22. Hook up PCV system. 23. Wait 24 hrs for JB Weld to cure, then hook up the main fuel line and fuel return line to the Hitachi Y-shaped fuel inlet 24. Hook up electric choke and fuel cutoff solenoid to 12V ignition source (Test them first, but usually the connections to the old Hitachi choke can be used) 25. Connect the Weber's right vacuum port (should be under the choke) to the distributer vacuum advance (the vacuum port on the brass fitting mounted on the distributer) using the 1/4" vacuum hosing 26. Place the top air box plate on the air filter element and secure the two plates 27. Use your Hitachis throttle return spring as your Weber's return spring (or you can buy one at any autoparts store for a couple bucks). Finding a place to hook the other end can be a bit tricky, but I found that hooking it to a hose clamp near the Hitachi works well. Deleting the ASV System The ASV system is not a needed or required emissions system, so it can be deleted and plugged. The following steps will illustrate how to remove and plug the system. 1. Follow the steel pipe on each head to where the ASV connects to the exhaust Y-pipe underneath the engine. 2. Use vise grips or a large wrench in combination with PB Blaster to break the fitting loose. 3. After you have removed the fitting, loosen the bolts that hold the upper part of the pipe assembly on to the engine block 4. Remove ASV assembly 5. Use your method of cutting to cut the end off of each pipe and remove the hollow bolt that screws into the bottom of each head. (This is the one you needed the vise grips for in step 2) 6. Take a quarter (as in .25 cents) 7. Optional: coat quarter with Hi temp gasket maker to ensure complete seal 8. Place quarter into hole in the bottom of the head. 9. Screw in the hollow bolt until tight You are officially done with the installation of your Weber conversion!! Your next step is to tune it for best lean idle, and to advance the timing. I have my timing set to 18 degrees BTDC. See a few posts down for instructions on that process. For more information on this conversion and for advice on how to modify the exhaust system to get even more out of your Weber, see Loyale 2.7 Turbos post on his EA82 Weber conversion. My guide here are simply the condensed steps, while he goes more in depth. I would HIGHLY recommend you study his thread thoroughly! "http://www.ultimatesubaru.org/forum/topic/71510-ideas-on-swaping-a-weber-carb-on-ea82%C2%B4s/">http://www.ultimatesubaru.org/forum/topic/71510-ideas-on-swaping-a-weber-carb-on-ea82%C2%B4s/ For additional mods to make your car even better, or if you want a different way of routing your accelerator cable in place of the Weber cable bracket, see Knucklehead Saloons post here: http://www.ultimatesubaru.org/forum/topic/165020-goodbye-pingtashi-hellooooooo-weber/?p=1370223 If you found this write up helpful please let me know! If you have a question or something is unclear, PM me or just ask it on this thread.
- 9 replies
-
- 4
-

-

-
- weber 32/36
- carburetor tuning
- (and 4 more)
-
22 degrees forecast for when I plan to start my ‘84 Webered EA81. I have never started this carb in weather so cold. 500 miles from home, with an old battery, also. Any suggestions for a cold weather start?
-
Hello. Having trouble with my electric choke. When the weather is hot i have no problem starting car and driving it around. Problem came when one morning it was a little cooler and engine would not stay on by itself only by playing with the gas pedal. I know this has to do with the choke. I currently have electrick choke conecyed to the back of alternator. Maby i need a different source of constant 12V from somewhere. I am using a weber carburetor any ideas were i can properly connect the electric choke too? I beleive power source should only be there when i turn the key. Thanks.
-
85 EA81 Brat New Weber Carb New fuel pump Both New fuel filters New ignition coil New battery Brand new Distributor New sparkplugs gapped at .44 New spark plug wires. (Correctly ordered on the cap) New Distributor cap and rotor New PCV valve Timing is correct (checked nine times) New exhaust Did a compression test and it was good. Don't remember the numbers though Still won't start. I don't know why. Any advice or help?
-
I have a weberized 85 Brat with the 3 speed auto transmission. After a couple months I finally got it running. It idles kinda rough and i have to keep the timing fully retarded (literally) or it will stall out, but it does idle. I believe that there are no vacuum leaks so it shouldn't be that. My main problem is that it idles at about 1K and revs fine, but as soon as its put in gear the RPMs drop to about 500 and it splutters and shakes. If i give it any gas at all while its in drive or reverse it dies, no matter what i do. It seems as soon as a load is being put on the tranny/engine it dies. Does anybody know what would be causing this?
-
I have an 85 Brat with a Weber Carb that won't start. I have replaced: Distributor cap Distributor rotor Fuel Pump Both Fuel Filters Spark plugs Spark plug wires The closest it ever got to starting was when I put carb cleaner in it. So maybe even though it has all new fuel parts it still isn't going to the carb? Any advice would be helpful.
-
I have an 85 Brat that I just put a new weber carb on. Problem is when I got the carb mounted up and started it the car immediately went to 5K RPMs and sat there. I checked the throttle wheel and it was ok. I even started the car with the throttle wheel assembly completely unattached from the carb, but it still idles at 5K RPMs. I know I must be missing something. My guess is a vacuum hose. So far all I have hooked up to the new carb is the fuel line and the vacuum hose to the distributor. My questions are what else do I need hooked up to the carb? And if I do need something else where is it and where do I plug it up. I'm new at this so any pictures, diagrams or whatever would be much appreciated. I can add some pictures tomorrow of the car tomorrow afternoon if anybody thinks it'll help. Thanks!
-
Soooo, I bought an 85 Brat earlier this month that had been sitting for a couple years and has a bunch of wasps nests. I'm close to getting it running, but I don't want to have those wasps in there. They are in hard to reach places that. I have been using PB Blaster to kill them. Anybody have any suggestions for getting rid of these SOBs?
-
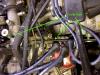
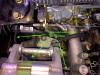
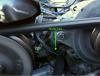
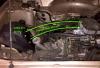
I just recently bought an 85 Subaru Brat for 500$, that supposedly only needs a new carburetor. Like most people on here I'm doing a Weber 32/36 swap for it. I don't need to pass an emissions test so I want to get rid of as much unnecessary stuff as I can (EGR, vacuum hoses etc). My question is what hoses can I either cap off or just pull completely? I have pictures of my engine bay, with the Hitachi gone. I would appreciate it if someone could label them. Pics: https://ibb.co/hnqbjk https://ibb.co/kEKfAQ https://ibb.co/fOVbjk https://ibb.co/mSv94k https://ibb.co/nkRGjk
-
Just got my weber today and installed it. Well, kinda. I have the fuel in connected, and that's all. 1. Which out of these vales are my pcv, and can I plug the other? pic 2. What out of these tubes do I need? No egr or asv pic 3. What do I connect to this outlet and where do I get my electric choke wire from? pic Edit- BB code
-
 Just installed a Weber 32/36 DEGV this weekend. I wasn't sure what to do with the vacuum port on the EGR, so I left it alone. Drove 300 miles home just fine and super smooth. Got in touch with Weber and they said to remove the screw-type plug from the front left port on the Weber, so I did. Hooked a vacuum line from that port directly to the Weber last night. This morning on the way to work, the car would hesitate and/or stumble, no noise, just bog down a bit on the acceleration and randomly pick back up. Ran fine yesterday, so I unplugged the vacuum line to the EGR. Now it runs super smooth again. Forgot to add, EGR was recently cleaned, and the intake EGR ports were cleaned during the Weber install. EGR seems to operate properly, opening and closing as I rev the throttle up and down. So, I've read that keeping the EGR is ideal, but not necessary. Am I missing something on the install, I thought it should be direct from Weber to EGR? Any explanation would be appreciated. Thx all. EA81 GL 2dr Hatch
 -
 Bought my self an 82 DL Brat that has a 32/36 dgev or dgv weber on it. Starts right up even in cold weather. Idles great but when you're giving it gas it has 2 spots that it'll start to bog down before running smoothly and what not. I'm thinking it has the wrong jetting, but I haven't messed with a weber in a few years so I'm trying to get some outside advice.
 -
Video of truck: Starts off stationary - at operating temp 0:10 - 0:30 then fwd 1st at 0:31 - 0:49 4wd lo first gear 0:50 into second last 10 seconds is 4wd lo 2nd gear, but going slow. Only speedo tach and thermometer work. I have oil pressure, and I'm not pushing 18v. I've done a new weber carb, fuel filters, plugs, plug wires, coil, and egr delete. Oil and filter are fresh These are the stock redline Weber subaru kit jets, with the short air filter, and a free flow (hollow cat, single muffler) exhaust Any ideas on what I should do next? This has been the problem my almost my entire time owning this thing, would be great to finally be able to floor it without killing it.
-
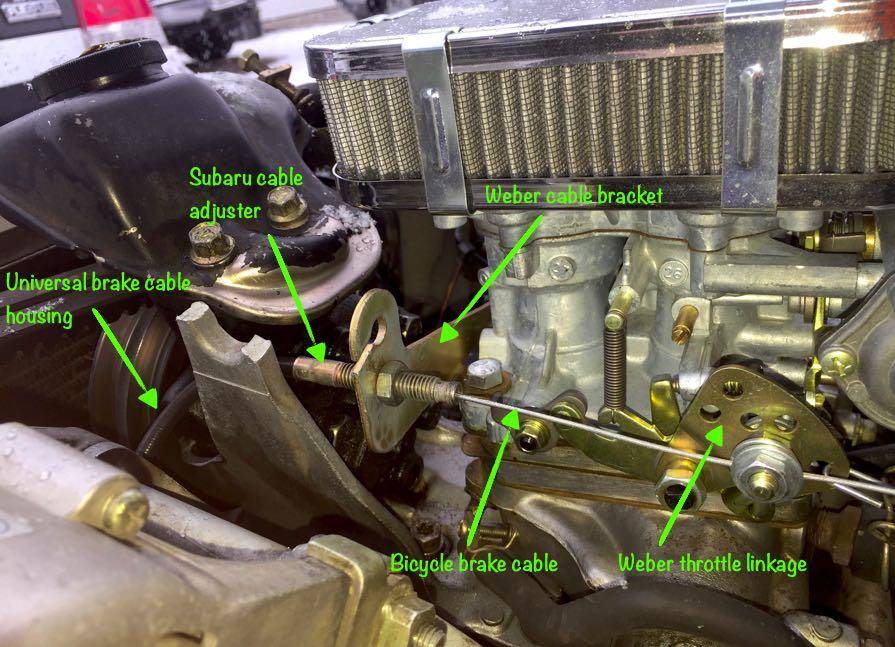
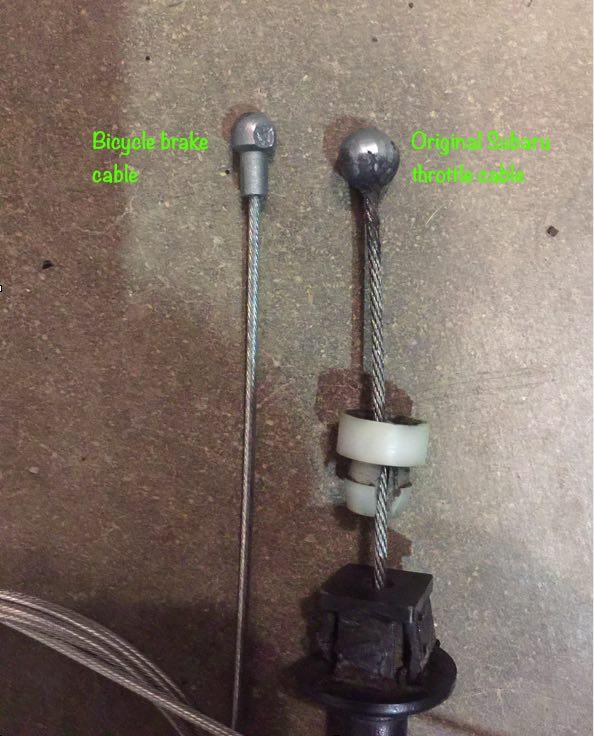
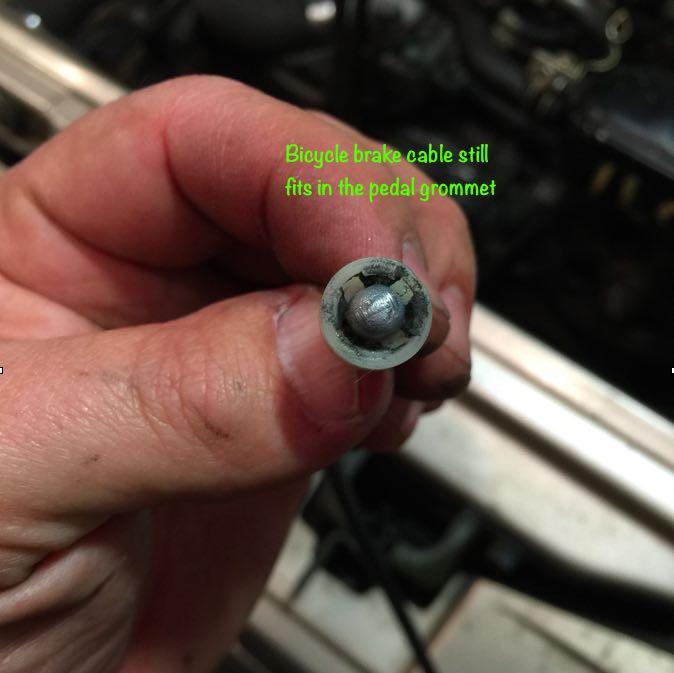
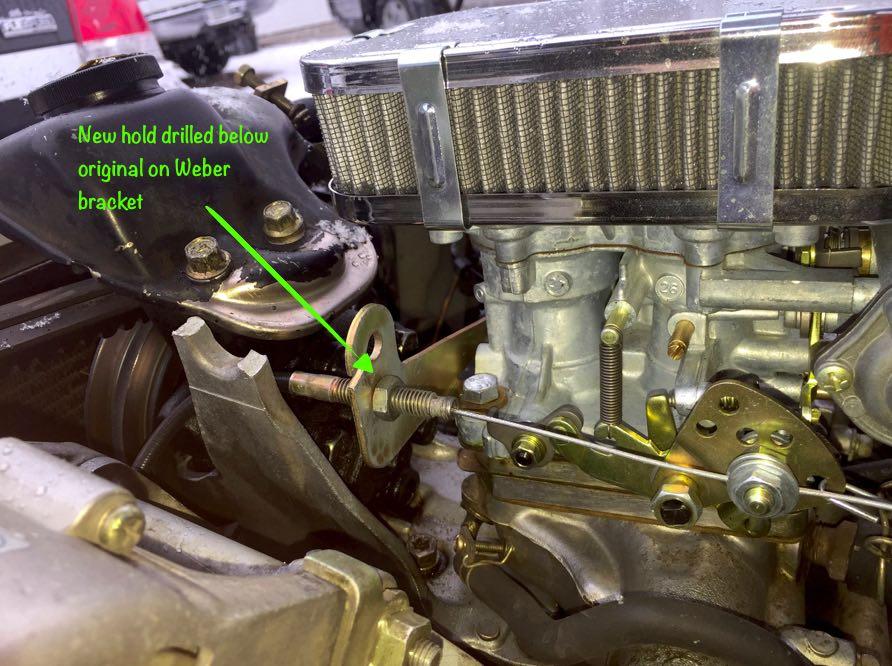
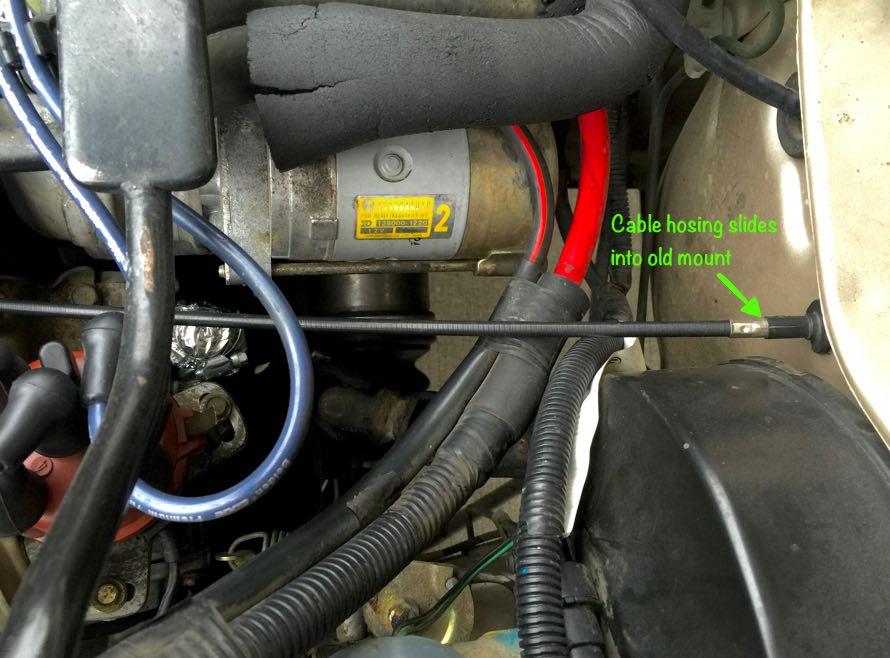
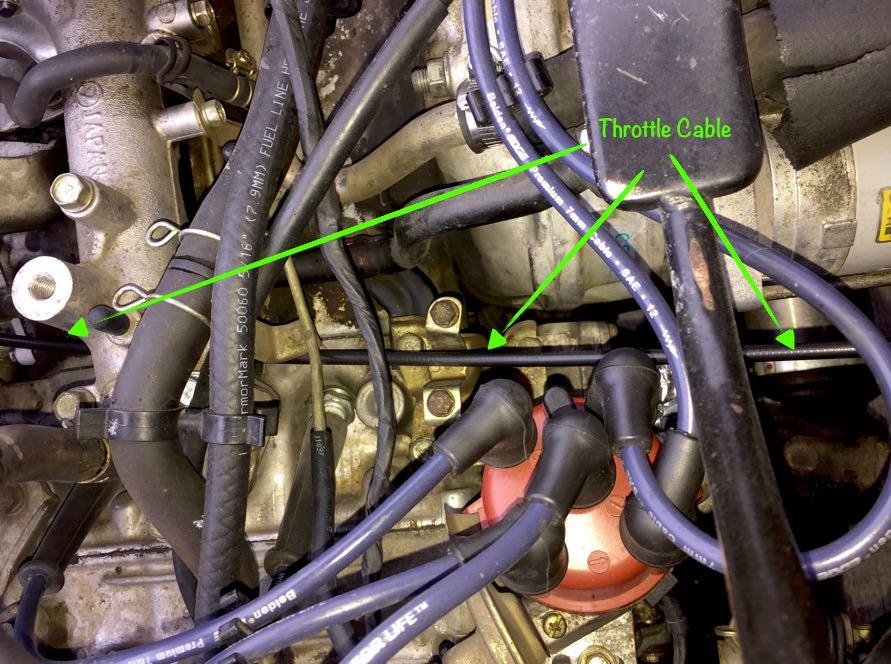
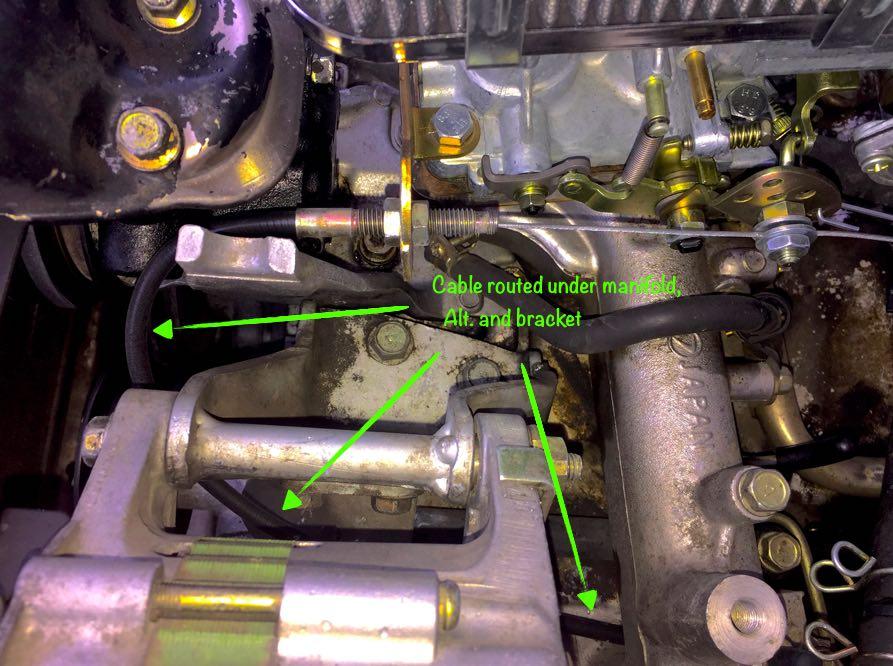
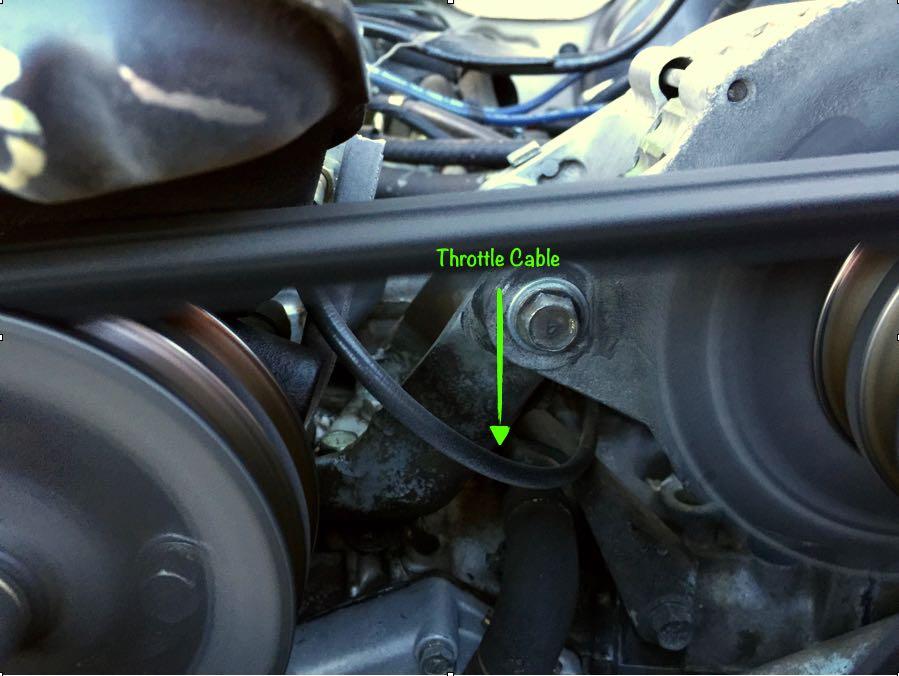
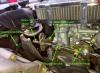
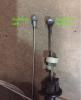
Many of us have done or are interested in upgrading our factory carbs to the Weber 32/36. But there is a challenge in fitting the electric choke version to our EA82 motors with the P/S reservoir right up front. Some have claimed they were able to dent in the back of this reservoir with out any ill effects. However I found a few comments made over the years stating that the electric choke wanted to intrude on the P/S more than a ball peen hammer can address. I am among this group. After installing the Weber/Redline adapter plates I found that the front of the electric choke wanted to be so far forward it would almost be touching the reservoir mounting bolts. There was no way I could bash in that much of the reservoir without causing big troubles. So I decided to install the Weber backwards. This of course caused a problem with routing the throttle cable. Once I found the best path the factory cable was not long enough to reach. So I made one. The parts I used were Brake cable from a road bicycle (think Tour de France) These have a similar ball end that you need. Universal motorcycle throttle cable kit (5' housing and assortment of fittings) http://www.amazon.com/gp/product/B00O1C2L7S?psc=1&redirect=true&ref_=oh_aui_detailpage_o03_s00 Old factory Subaru throttle cable Here you can see the different parts to make the throttle work. After cutting the universal throttle housing to length I re-crimped the Subaru factory adjuster to it. You can also see that I am using the Weber linkage instead of swapping the Subaru cam. I was unable to get the secondary to open with the Subaru cam link so I tried the Weber and it worked on the lowest hole. You can see that the ball on the bicycle brake cable is smaller but it is still large enough to work This is the grommet that captures the ball end of the cable to the gas pedal The factory hole in the Weber cable location bracket was to high and was causing binding, so I drilled a new one to keep it level with the throttle linkage. The universal housing slid snuggly into the grommet in the firewall. I routed the cable low past the distributor and under the intake manifold. I continued it under the Alternator out the front and under the lip of the P/S reservoir. There is plenty of clearance from the belts and pulleys no worries. I really don't like the small air filter that comes with the Weber. I don't see these things doing a very good job on dry dusty dirt roads. So I went down to the junk yard and pulled the air filter box off a similar year EFI engine. The air box bolts right into the carb engine bay. I am tracking down the parts to make this work with the Weber. The benefits will be better filtration and it will be easy to find replacement filters when needed. I will update this post with pictures when it's complete. I am using an aluminum air intake adapter on the air box. The hole in the EFI air box and the adapter are both 3" in diameter. http://www.amazon.com/gp/product/B00HG7D56G?psc=1&redirect=true&ref_=oh_aui_detailpage_o01_s00 I also advanced the timing to 12 deg while doing this conversion. I might advance the timing a little further.


-
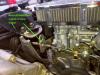
Ideas on Swapping a Weber Carburetor on a Subaru EA82 Engine In this Writeup you'll find The Basics: ► A complete installation Guide. ► Solving problems untold by the Manuals. ► Jetting for the EA82 to be used between Sea Level and ~ 6500 Feet (2000 Mts) Altitude. ► Proper routing for the P.C.V. (Positive Crankcase Ventilation) System's Hoses. The Advanced: ► A much better Adapter Plate than the one designed for the EA82. ► What to do with the ASV, EGR, etc... The Optional: ► Installing an Oil Catch Can on the P.C.V. System. ► Distributor's Advance Modifications. ► intake Manifold Modifications. ► ignition Coil upgrade. ► Exhaust Piping Modifications. ► ...and Much More! Pay attention to the "Important Notes" Introduction: On early 2006 I Swapped a progressive Weber 32/36 Carburetor on my 1985 Subaru White Wagon (which isn't white anymore),, that swap job required more things to be done than what the Manual included with the kit, stated; so I'll explain here everything that is needed to successfully do the Swap, and I will add Photos describing all the problems I faced and the ideas I had to solve them; Hoping that this writeup will Help you to Swap a Weber carburetor on an EA82 Subaru engine, flawlessly. Many of the Ideas that I explain here, are also aplicable to the older Subaru EA81 engine as well, basically talking, almost everything except the adapter plate. REMEMBER: Use this Ideas at your Own Risk! First of All: the Redline-Weber K-731 Kit, which is designed to install a Weber carburetor on the Subaru EA82 carbureted Engines, came with the following items: A Progressive Weber 32/36 Carburetor, an Air Filter Box plus its element, a Throttle Cable Bracket, some Gaskets and a two plate Adapter, which consists on one Lower plate designed to be mounted directly to the intake manifold, and one Upper plate, designed to be mounted over said Lower plate; this last one receives the studs which are intended to Hold the Weber Carburetor in place; and needs the Gaskets inbetween ... Also this kit, comes with a bag with different screws and the studs. All the Weber carburetors that are Sold in the USA, comes with a sticker with a Statement that says something like: "For Racing -or Offroading- Purposes Only" due to Smog, pollution and other Legal Regulations which varies from State to State, so They're Not "Street Legal" on certain areas and that statement shall be placed on all brand new Weber Carburetors, due to said Legal Regulations; so you must be sure that you are legally allowed to do this Swap on the Area where you Live, prior to start. Determining which type of Weber carburetor you do Need There are many different Weber Carburetors' Designs on the market, however the two models used more often on Subaru Engines, are those who features two Barrels. (Forget about using a single barrel carburetor on these Subaru engines, simply it doesn't worth the effort.) Basically talking, there are two variations of the two barrel design on Weber Carburetors, that works good with these Subaru engines, one design is known as the Progressive Models (being the most popular, the 32/36 DEGV) and the other design is known as the Synchronous Models (being the most popular, the 38/38 DGAS). Each of the two barrels, has its own butterfly that opens / closes according to the Throttle position; if you want to be Sure which model you do have, just take a look at the Linkage that opens the butterflies between both Barrels, it is located behind the throttle plate: If Both Butterflies on both barrels, opens at the same time, always when the throttle position moves, it is a Synchronous Weber (like the 38/38 DGAS); But if one barrel's butterfly starts to open only after the other one have already reached the half way open, then it is a Progressive Weber. (like the 32/36 DEGV). The Synchronous Webers, like the 38/38, are used mainly for Racing purposes due to the Higher Fuel usage (Both identical barrels works / opens at the Same Time, all the time), and thus means that if you use a Car with such kind of carburetor as daily driver / commuter, it will become a Gas guzzler. The Progressive Webers, like the 32/36, are used for all mixed driving needs, as you commute using only one barrel which is known as the Primary -Low- Stage (usually with a Smaller Jetting); and the other barrel, which is known as the Secondary -High- Stage (usually with a Bigger Jetting) is only in use during deep accelerations, so you have the Best Balance between Power and Fuel Consumption. I chose a Progressive 32/36 Weber carburetor, which is, in my own humble opinion, the best option in Carburetor that you can choose for this retrofitting job; however this writeup is still applicable, if you have a synchronous Weber. That been said, lets Begin to explain the Problems I Faced during the Swap Job, and How I Solved them. ~► First Problem: The Lousy Adapter Plate. As I stated above, the K-731 kit that I obtained from Redline Weber, came with a Lousy Adapter, conformed by two separate Plates, Lower plate and Upper plate, each one has its own flaws ... ... The Lower Plate needs four screws to be Held properly in place, directly bolted to the intake manifold; each screw has a cone shaped, flat top head, whose angle is approximately 60° and is designed to fit on the also cone-shaped seats of the plate's openings; the matching angles holds that plate in place. Then comes the Upper plate, which goes directly bolted to the Lower plate; finally, the Weber carburetor mounts on that Upper Plate. The Flaws of the two-Plate adapter: While the weak thin walls on the threaded openings for the Studs, is the main flaw on the Upper plate, (Look for further information and photos regarding the Upper plate, on the following post of this writeup); the way to bolt the Lower plate to the intake, is another flaw, let me explain: The Redline-Weber K-731 kit came with two different sets of screws provided to bolt the Lower Plate of the adapter, to the intake manifold; one set of four silver screws, comes with the appropriate size and pitch for the Subaru EA82 intake manifold's threads (6 mm ~ 1/4"), but the heads of those thin screws are very small, around the half size of the cone shaped seats on the lower adapter plate. The other set of four black Screws provided, are thicker (8 mm ~ 5/16") and their heads fills completely the cone shaped seats on the lower adapter plate; but their thread and pitch are big and do not fit on the intake manifold's threads. Here you can see a comparison photo, of one of the silver 6 mm screws (I call it "Subaru Standard" screw) provided, next to one of the black 8 mm screws (I call it "Weber Special" screw) provided, for the same Lower plate: (sorry for my Cheapo Cellphone's camera photo) It is impossible to bolt in a ►"safe"◄ way, the Lower plate to the intake Manifold using the thinner 6 mm screws provided; but I bet that they included both sets, in order to let the unexperienced or Lazy mechanics / owners, to swap the carb fast and easy. Those tiny silver screws will make the first plate to get Loose, developing vacuum leaks sooner or later, because their small size, makes the screws to have enough room inside the plate's opening, to move and slowly unscrew, from the engine's inherent vibrations; it's only a matter of time. Also the tiny silver screws only covers half of the seat, on the openings of the lower plate, making a weak union. I already faced a vacuum leak: I was unexperienced when I did my first Weber swap, years ago, and I used the tiny silver screws as they matched the threaded openings on the intake manifold... it developed a Vacuum Leak between the intake and the lower plate, in less than a couple of months, despite that it was bolted tight, using a shellac smeared gasket. After that vacuum leak, I removed the intake manifold to check the install, and then I understood the reason why they put a second set of screws by seeing how loose the Lower plate became with the tiny silver screws... I decided to use the Bigger diameter black Screws, instead. In the Photo Below, you can see how the Heads of the silver 6 mm (~1/4") screws, doesn't fit properly on the cone shaped seats of the lower plate adaptor; they only covers the half from the cone seat and their heads doesn't fill completely the space of the opening in that plate. Next to it, you can see how the Heads of the black 8 mm (~5/16") screws, really fits perfectly there, they sits on the whole cone shaped base, while filling completely the opening, giving a much safer flush mount, which prevents the screws from getting loose with time and vibrations, as they doesn't have space for moving, because the Upper plate will be placed over them. So, some modifying job to the intake manifold is required for sure, if you want reliabilty: to drill and tap it, re-threading the intake manifold's threads to match the size of the bigger black screws provided, in order to use them to bolt the Lower plate properly, and firmly in place. To make those Bigger diameter black screws to fit, You will need to Drill and tap new Bigger Threads to the intake manifold, but Be Careful when doing that: The intake manifold is also a coolant crossover, so you must take the proper depth measurements to avoid drilling onto a water passage. I Kindly Suggest you to remove the whole intake manifold from the Engine, prior to do the rethreading. Here you can see how the intake Manifold originally was, right after removing the old Craptachi carb and gasket, just before removing it from the Engine: I took off the whole intake manifold to Drill the New Oversized Threads From 6 mm (~ 1/4") to about 8 mm (~ 5/16") Also I Sent the intake manifold to a Machine shop, to polish the flatness of the Carb's base: Here, you can see how the Bigger black screws Now fits perfectly there: Then, I Washed clean the intake manifold using Household Detergents, to remove any debris Important note: I kindly suggest you, that the inbetween gaskets should be placed Smeared (the two faces) with a thin layer of Shellac, because shellac is Coolant / Oil \ Gasoline Resistant (more info on Shellac ~►Here) other gasket makers will fail in that place; the idea is to avoid any kind of Vacuum leaks. ~► Second Problem: To Seal the (Now Unused) Water Passage for the Old Craptachi Carb. If this procedure is not done right, the cooling system will spill coolant on the intake manifold, right to the carb's base opening, so be Careful! My first solution was to place the Gasket completely smeared with Shellac over that water opening, and also I cut in half the tiny Hose which supplies coolant for that Passage, and cap closed both ends of said hose, using screws and clamps... That lazy solution worked fine for five years, but you must consider that there is still a coolant flow inside the water crossover of the intake manifold; so there still will be coolant flowing on that Area, even without said hose. You might use Cold Welding Compound such like the 4 minutes "JB Weld" to fill close that opening ... as I wrote, I ran my subie for years with only a Shellac smeared gasket and a removed hose without problems, but that setup was about to Fail after five years. Continue reading, in further posts of this writeup I will show you another Idea which is a definitive and permanent solution for this problem. After placing the Gasket, smeared with Shellac on both sides, inbetween the intake and the first plate, I bolted it there: (Notice the Bigger Screws and how their Heads fills the Plate's openings) Then, the Upper plate went over that first one, Also with a gasket smeared with Shellac on both sides, inbetween: And Then you can place the Weber Carburetor. ~► Third Problem: Power Steering Equiped Models. If your EA82 engined Subaru, has a Power Steering Pump, the Choke's Spring mechanism on the Weber Carb, will hit the Power Steering Pump's reservoir ... ... and even removing the Choke's Spring, the base for the said spring, impacts the bolt's head at the back of the power steering pump. (Here, the Choke spring was already Removed from the Weber Carburetor) At the Caribbean Tropics of Honduras, we don't need the choke too much, so... ► My first solution was to Remove the Choke's Spring, but it wasn't enough: also I had to cut Half of the head from one of the Steering Pump's Rear Bolts, to prevent the Base for said choke's spring from hitting it. ► A second Solution consist in, besides from removing the above mentioned Spring, to Completely Remove its Base from the Carb, along the choke's Butterflies (or choke plates), so you don't need to cut nothing. ► A third solution done by other persons, is to install the Weber Backwards, with the Choke facing the windshield instead to the front; it is doable, but in my own humble opinion, it might lead to another complex set of Problems. You can see photos and read further, in this example: ~► http://www.ultimatesubaru.org/forum/topic/156836-installing-weber-3236-backwards/ ► After lots of Research, I found a fourth and definitive Solution, which is easier than all the others. Continue reading, because in the next posts Nº 2 and 3 of this writeup I'll explain with details this better Solution ... ... which does Not require to modify, to cut nor to remove anything, so you can keep the Weber carburetor with a working Choke on the Models that features Power Steering, as easy and simple as install and go. Hooking properly the Accelerator Cable I installed on the Weber Carb, the throttle's Cable Plate Taken From the old Craptachi carb... ...Plus the part of it that works with the Air Conditioner Accelerator Actuator, which with a simple twist on its metal plate (due to the new carb's different angle) I managed to made it work good. The K-731 kit from Redline-Weber, also includes a Bracket to hold the Accelerator's Cable in Place, you must install it Carefully without Bending it, on the two rear screws that holds the Carburetor, on the Adapter plate; and you'll notice that the Accelerator's Pedal really covers the complete Acceleration Travel on the Weber Carburetor. In case said Bracket is bent Towards the Carburetor, the accelerator's Pedal will never get the Full Acceleration from the Carburetor because the Cable doesn't go Back enough to fully Open the Secondary -High- stage; in that case you'll need to bend it back; but Never do it when it is installed, it could damage the Adapter Plates; so take the Bracket out and bend it there. Once the Bracket is properly set, the accelerator pedal provides full travel for the accelerator on the Weber carburetor. So, the Intake Manifold + the twin Adapter Plates + the 32/36 progressive Weber Carburetor + the accelerator cable's Bracket behind, ended looking in this Way: (Yes: Those are my dirty Hands) Once installed, the EA82 Engine started at the Very First Try and Purred like a Kitten... a Boxer Kitten! ... ... you know. The Weber carb reveals somehow the Hiding potencial of the engine, and the Boxer Rumble Sound of the Carburated EA82's at its Best! ... ... While lets you Clean the crowded engine bay, removing lots of unused smog stuff. It is a Win-Win Deal for sure. I Noticed a Huge Improvement inmediately! ... Summarized in a quicker Engine Response and Faster Acceleration, smoother Idle and a really noticeable Better Low end torque. Fuel Consumption remains close to the Stock Specs ... (if you drive carefully) ... but the Weber swap could make you to want to keep the gas pedal floored ... ... in that case, fuel consumption will increase for sure
- 10 replies
-
- 2
-
-
- Carburetor
- Adapter Plate
- (and 8 more)
-
Here is my 1985 BRAT that I call Shadow. it's all stock except for the Weber and the GM Alternator swap. I've spent the last few weekends detailing and shining. Just in time for non-stop rain here in NC. Kind of depressing to think that I'll have to put Shadow up for the winter soon. You can see my 96 Impreza Outback in the reflection here. Unfortunately, shes not as clean as the BRAT but she runs as smooth as the day I drove her off the lot. I did a little detailing of the engine compartment this weekend. I could spend a bit more time on this for sure! I'd love to detail and wax the underside of the hood. I had the stock 8 spoke wheels sandblasted and painted. I put new lugs on this weekend and shined the tires. ($180 for a set of four 13" Kendas!) Yesterday I replaced the tailgate badge with this restored one. Still several items on my to do list. Lots of shining and polishing. New axles soon. Dented fender replaced with a new one I have in hand. Just needs painted. I have a new dashboard frame for the one i have that is cracked. Need to troubleshoot the fuel gauge. Otherwise Shadow is looking like she'll last a long time.
-
Wanna snorkel my brat, but with the weber it seems a little harder. Would be awesome if people would post theirs! Thanks - CL
-
Wanna snorkel my brat, but with the weber it seems a little harder. Would be awesome if people would post theirs! Thanks - CL
-
https://drive.google.com/file/d/0B44JjK5C_rtDRkNHRlhzcXNyNWs/view?usp=sharing https://drive.google.com/file/d/0B44JjK5C_rtDM0I0MVp5RmxYMG8/view?usp=sharing https://drive.google.com/file/d/0B44JjK5C_rtDMnZ0T1FwMllqQjA/view?usp=sharing Links above are Pictures. Just wondering what tubes I really need. Deleted and capped the egr yesterday. Weber should be here in a few days.
-
I am Looking for advice on Where to purchase a Weber carb for my ea82 to replace my Hitachi carb.My car is an 85 GL-10 with a 60,000 mile EA 82 from an 89 dl with my old intake and disty. ALSO..... Will I need a fuel pressure regulator? Is there a fuel return line hookup? If not, what to do with the current return line? Are there better adapter plates with different vendors? Is it worth it to look for a used weber and rebuild it?
-
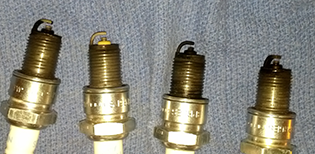
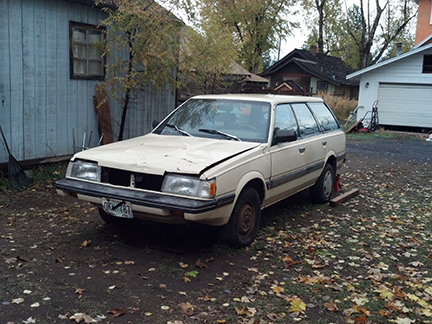
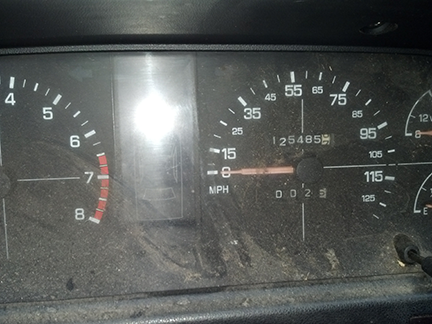
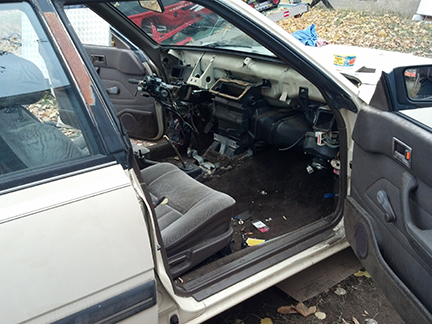
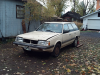
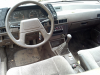
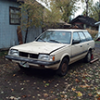 Hellloooo USMB. First off, thanks for all the advice on here. I've been lurking for awhile, probably should have posted something earlier but anyway... like before I bought this flesh-colored wagon. 1987 GL wagon, carbed, Hi Lo tranny and 125,480 miles and lots of...let's call it character so I don't start swearing lol. First mistake-- didn't drive it much, towed it home. Replaced (new parts) water pump (old one dead) timing belts plugs (NGK R) Wires Dist Rotor Battery Has 1/4 or so new gas with a bit of sea foam Used Weber DGAV 32/36 Carb, trans-dapt mounting plate, 130/130 jets. No choke. Doesn't have air filter on it meow. I've also ripped out the interior and cleaned out the critters' collection). Sheesh that was a PITA. It seems that either engine mounts were sheared or the bolts fell off?? One of them doesn't line up. There's a bit of crumple around the hood zone, and no grill. I did some compression tests, and they are loooow. ($25 Harbor Freight tool) I tried to give each cyl 10 cranks, and did each three times. Removed all plugs. Didn't do wet test, from what I've read (source:internet) boxxer engine doesn't give best results for that? I can probably figure it out if y'all think I ought to tho. 3-70, 60, 75 psi 4- 70, 80, 80 psi 1- 80, 60, 70 psi 2- 70, 70, 80 psi This was warm. (I also did the same test cold (like at 40 degrees) and they were all 100-110 psi what gives?? I did procedure same same, maybe there was moisture in there, it had been sitting for awhile?) Also, if I keep cranking, it will keep going 100+, but doesn't jump a whole lot the first crank, 10-20psi. If I let it idle, it will eventually stall out with fouled plugs after 15-20 minutes. With clean plugs, when I run it at 3500 or so rpm for a few minutes (in neutral, it ain't regstrd yet), the plugs look like this--(left to right 1,2,3,4 cylinder) Odd, no? The #2 looks healthy, but the others are blackened. I guess "fluffy" describes it. If it won't start, it has been bc plugs are fouled, and #3 has been wet fouled. This is what I think, but I the stump has been chumped, and I would like your input. 1. The carb needs adjusting. There may be a small vac leak. The idle mixture screw doesn't seem to make much difference, although I think I can hear a sucking sound when I screw it all the way in (idle screw in = less gas for idle?) 2. The engine needs a rebuild, and the plugs will continue to foul until that is done. Headgaskets came to mind? but the exhaust doesn't smell sweet by any means. It blows out a bit of white exhaust I guess. I have had to fill the coolant, but I figured that was just the cooling system filling in? Something to keep an eye on anyhow. me--> What do you think? Is there any other info I can provide? All input is welcome! I appreciate all your knowledge and have learned a ton lurking. Thanks A Bend, OR (ps hope the images are large enough, they look small in preview...)
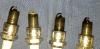

-
I'm looking for all the help I can get. Posted on the orig. justy forum as well (troubleshooting). Here's some recent work I've done on it: weber carb install, new starter, fuel pump/filter and hoses, new battery, new alt belt and had the alt tested. I checked for spark on all the plugs and looked fine, they're pretty new still too. It was pretty cold this morning, and "Clifford" wouldn't start up. Here's a video of what happens: Usually I have to depress the accelerator about half way to get it started cold, but in the video there's only a little change in how it turns over once I depress it fully. One thing at a time...