
Numbchux
Members
-
Joined
-
Last visited
Everything posted by Numbchux
-
if you leave all the weight in there, you might as well just put it in FWD. removing them isn't hard, and isn't permanent. and seriously, if all you remove is the driveshaft.....there are almost zero benefits.
-
mileage, performance. if you actually remove the driveshaft, rear diff, and axles....that's a lot of rotating mass (not to mention it's weight independent of the rotating factor). yea, driveshaft, rear diff, axles, mustache bar.....all can be removed. you might want to still put the outer DOJ cups on the spindles, as they help keep dust/dirt out of the bearings. although, I really don't understand how not offroading means not driving in the snow :confused:
-
couple things going on here. first, the pins you listed are not all on the same circuit. study the diagram again. 17 and 18 are grounds, simple as can be. should be entirely independent from 82. 75 should also be a ground (although it's not listed on the pinout....something to do with the traction control system) 82 is the neutral switch. if you study the diagrams, you'll probably notice that a number of the wires are marked (AT) or (MT). this is because the polarity of the neutral start switch is different depending on what kind of trans is attached to it. so the diagram gets kinda confusing. simple version is: assuming you've got pin 81 grounded (telling it that it's hooked up to a manual), 82 should be grounded when the trans is in neutral. this is entirely optional, but the ECU will throw a code if it isn't hooked up.
-
yep, good for '89-'94 legacies
-
no Ea81 had 25 splines Ea82 and EJ22 axles are longer and will not work with EA81 control arms. so, if you want a 25 spline trans and EA81 hubs.....there's probably a way to put 25-spline DOJ cups on the EA81 shafts.
-
I don't know how you could get this far and have such a simple problem....the power and ground circuits pretty much don't need to be modified.....but depends who did it and how... http://www.numbchuxconversions.com/Files/FSMs/1992_Legacy_ECU_I-O.pdf
-
sell the carb, swap to FI. yes, it can be done. but even if perfectly tuned, I HIGHLY doubt you'll ever see as much power as with the stock FI. but perfect tuning doesn't come easy, and it'll involve quite a bit of fabrication. the FI will have gobs of power from the moment you turn the key. and if you have problems, it has some capabilities to tell you what is wrong via the CEL.
-
I've done it both ways, and I've always said a parts car is better than parts. you know the history, you know you have everything, and you can probably make a few bucks selling off stuff you don't need.
-
correction: sprung and valved softer than the impreza considering their weight. i.e. they're almost identical.
-
I haven't had one in my wagon since the engine swap. 35k miles with an EJ22. couple AutoXs, lots of ice racing, lots of driving like a moron. haven't noticed any negative effects. BUT, there should not be enough force on it to break it. that's what would concern me. definitely check those engine/trans mounts.
-
sucks man!!!! why on earth were you running 92 in it? don't like your money very much?
-
meh, if you've still got a working fan, you could put a dozen lights up there and not really have an issue (with airflow anyway.....your alternator would probably implode though....)
-
I did a clutch on my lifted wagon by dropping the trans a few years ago. probably took me 10-12 hours total, over the course of 2 days. didn't even have to lift it off the ground. left the axles in the hubs, just lowered the trans, then slid it to one side and pulled one axle off, and to the other for the other side. and ditto to put them on before lifting the trans back up. mine was a 4" lifted EA82 on 28" tires, and with the trans rolled on it's side a bit on a mechanics creeper, I was able to roll it out from under the car without jacking the car up at all. a tip, when it comes time to put the trans back in. use a jack and wood blocks on the oil pan to tilt the engine back a bit. it'll make aligning the clutch 1 billion times easier. ratchet straps are awesome for this. I used one from the strut towers and down under the front of the trans, and a floor jack under the back. don't forget to drain the fluid before you start lowering. if you don't, when you slip and the back ends up a bit lower than the front, and it starts dumping gear oil out the rear output all over you chest, you'll spend days trying to get the smell of gear oil out of your skin. go ahead....ask me how I know
-
my last response in this thread. and if that wasn't enough.....here are a few places where it and other files can be found: http://http://offroadingsubarus.com/downloads/EA2EJ.pdf http://http://lib.store.yahoo.net/lib/mroseusa/EA2EJ.pdf http://http://www.ultimatesubaru.org/forum/showthread.php?t=73676
-
the EA axles won't work with the EJ hubs.....so yea, you'll need the EJ axles.
-
yep, push some water back through it (opposite from normal flow....), that'll clear any large deposits out.
-
oem tstats aren't terribly expensive. do it right and be done with it. running an engine below operating temp is bad juju
-
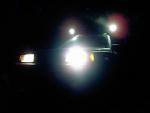
wrong side for torque converter bolts (unless EA82 4EAT torque converters are entirely different than 3AT or EJ 4EATs.....). starter hole is great for pressure plate bolts though! there is an access hole on the bellhousing of the EJ. should have a rubber cap over it. easily seen in this [blurry] pic of my EJ22 shortblock:
-
well.....off the top of my head... XT6 and EA82 calipers are interchangeable. baccaruda found an EJ-series (from an early legacy, IIRC) caliper bracket that allowed him to use XT6 calipers with his EJ knuckles. thus keeping the front ebrake even with the EJ axles and such. SO, I would assume that the reverse could be done. mount an EJ-series caliper to an EA bracket..... and yea, I've had trouble with those. the mechanism seizes up. had one car get so bad, that if I set the ebrake, I had to turn the wheel, reach behind it, and manually release the brake......not fun.
-
yea, TOTALLY depends on the price of the parts. which entirely depends on what you use and where/how you get them.
-
I understand the strut itself isn't vertical. but the strut top is moved straight down. if the block didn't have offset, the top would be moved out. and yea, I understand the existence of camber, and that it's there. but I've had a couple lifted EA82s. one on 27.5" tires and the other on 29s. drove them both for many tens of thousands of miles, never noticed any wear like that. so I really don't think this is just stock geometry amplified. I am curious how the toe is. has it been aligned at all? I think some toe-in could cause the issues you're seeing.
-
I'm fairly sure 15 degrees only compensates for the angle at which the strut top is at, and therefore moves the strut top straight down. I can't think of a way that the caster would have changed with the lift, but the camber definitely would have. I've easily driven 100k miles between my EA82s with stock Caster angles and never noticed anything like that.
-
ding ding ding! the angle of the control arms pulls the bottom of the knuckle in towards the car, giving it more static camber. to fix it right....you have to drop the crossmember. IMHO, just a one inch difference will keep camber at a reasonable amount, and you could do one inch blocks on the engine crossmember, and leave the tranny up as-stock. yea, you could extend the control arms, but your axles would still be at that angle, so you'd then extend the DOJs a bit, which means they'll be weaker.
-
EJ control arms are completely different. EJ/XT6 ball joints are larger and will not seat in EA control arm. an XT6 control arm will bridge the gap, bolting perfectly up to EA82 suspension, but having the larger ball joint hole. you could ream out the EA82 control arm. or another option (and pictures of an EJ ball joint in an EA82 control arm) here: http://www.ultimatesubaru.org/forum/showthread.php?t=97074
-
meh. gearing issues are essentially moot. with the torque of an EJ22, the extra gear isn't really an advantage, and you'll be able to use the top gear of either trans. I would definitely still recommend the 5MT though, just for the far-superior linkage and synchros.

