Search the Community
Showing results for tags 'swap'.
-
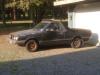
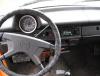
 Greetings, This time I am trying to do my Best to help a Friend, Mr. Mariano, who owns a 1980 Subaru GFT-5 Coupé, which came factory with an EA71 engine that features Twin Hitachi carburator setup. Here is a Photo of his Subie: Here's a Photo of that Subie's Engine Bay: Photos of the Actual factory intake manifold: He is in the middle of the Restoration process of that Subaru, and he really wants to get rid of those hitachi craps that seems like now they're bad beyond any repair, he dreams about to obtain a single carb intake manifold that fits his Subie's engine and fit there a Weber Carb. He already obtained a 32/36 Weber and the Trans-Dapt 2107 adaptor, also he obtained a Single carb intake that was sold to him as "For the Subaru 1600" which is the EA71, but the intake was longer, so we believe it was for the EA81 ... and he already welded with aluminium the Trans-Dapt adaptor to that unuseful -for him- intake manifold, as you can see... By seeing this Photos and seeing the Position of the Starter behind the engine, on a side, I want to Ask (To be sure): ► is that a Fat Case EA71, isn't it? ► Does the Twin Carb EA71's comes with Reversed Valves as the Twin Carbs EA81's does? Here is a Photo of his Original Owner's Manual about the Valves (in Spanish): Words in spanish over the Valve's drawing means: "Exhaust Valves" while words in spanish under same drawing says "Intake Valves". The main Question could be: ► Will a Single Carb EA71 intake manifold fit right to this engine, or not? Due to the Lack of Spare parts, we were crossing Private Messages, planning to cut the Upper part of the EA81 intake, along the welded adaptor, and cut the upper part of the Twin Carb EA71 intake, and weld the EA81 part to the Twin carb EA71 one, without touching the Water passage... Sounds crazy enough, isn't it? Please let us Know your Ideas about that, and the Answers to our Questions, which will be Greatly appreciated. Kind regards.
 -
Inhreited the Brat from my step-dad who bought it about 10 years ago. getting ready to turn it into a little rally beast. plenty of rust in all the common brat rust spots (plus a rather odd one on the underside of the hood), but shouldnt be too hard to fix. hard part is gonna be the drive system swap
-
so, as my topic says, im going to be modding my brat into a little rally beast. Im already looking for needed replacement parts such as hood, fenders, grill, rear bumper, etc. mostly cosmetic. but im still planning out the major modifications. One of the first things on the long list of modifications and repairs needed is an engine (well..actually an entire drive system, but engine being the focal point) for the much needed increase in power. im thinking the system from a late 90's impreza; ej25 motor, manual transmission, awd. actually, let me take a step back and just lay out the basic overall idea for the project. basically i want an every day driver that i can also go play in the sand with . cosmetically i want it to look like a factory soup up. very simple black body with white accents. mechanics is a who different story. im going to be building it for aggressive offroad use, so a small lift and slightly larger tires is in order. and an engine with much greater power; more specifically torque. any ideas on what engine or what vehicle to steal the drive system from? or any other ideas or tips? i will post pictures shortly, but considering im not in the same state as my brat at the moment, i only have pictures from earlier this year
-
 Hi guys, I'm new to this forum and would like some advice about the engine swap that will be getting done for my subaru pretty soon. I have a 2002 outback base 2.5l that I was pretty sure was a dohc when I first got it, and I havent checked the VIN yet to make sure since the car is at storage. Here is the question though, what would need to be done to make a DOHC work for a car that had a SOHC in it, because the engine is already on its way and it would cost way too much to send it back and get a new one. The engine I have coming is a 2005 ej254 DOHC 2.5l 16 valve with only about 65K miles on it, the engine block for my old engine is completely siezed up so replacing it is the only good option for me at this point, ill just scrap the old one or give it to someone who has the time to tinker with it. Any information would be very helpful , thanks.
 -
 Been surfing this site for a while but couldn't find a thread on researching older subaru's for a noob. Many years ago, I used to own an 88 GL Sedan with D/R 4x4 - nothing could stop it. Later I had a 90 or 92? Loyale wagon with the push button 4wd - good car just not as much grip low end power as the D/R, but a bit better on the HWY. Looking into getting another Loyale or GL wagon with d/r 4wd but don't know all the drawbacks to each model etc. I am not at all a mechanic, but I want to start doing some stuff on my own. Start simple and build on it, but most stuff I would need a mechanic if fixing was needed. I am not looking for a crawler, more like a capable daily driver/cruiser I could take to the beach, mountain, and camping(but able to handle some serious shiggy if needed). Would like to work at making it reliable for longer 1000mi+ car trips too(later). I see a lot of 87 GL wagons with the D/R 4wd for sale at a lot of different prices and newer Loyale wagons with the push button. I am pretty sure I want dual range 4wd but the loyales seem to usually be in better shape. A lot of broken down 87's out there which makes me consider getting the better running Loyale and later swapping in the d/r 4wd- if that is suggested? Questions - looking at spending around 1500 initially... Based on needs should I look at getting an 1987 with D/R or get a 90 or newer Loyale and convert to d/r later on - any idea on cost for shop to do? Is it better to buy something running well at higher price or get something that needs work at a low price? What should I consider when perusing craigslist? Questions to ask? Any advice or links to different threads is appreciated, maybe even links to CL with some pointers on why good buy or not. Just can't believe how much information there is and sifting through it a bit challenging for a noob. Thanks!
 -
 I drive a 92 Loyale wagon (standard, 4wd) and my brother has a 96 legacy wagon that he is planning on having towed off. Are there any parts that are worth taking for my Loyale? I know a lot of stuff isn't compatible but is there anything worth pulling? Thanks.
 -
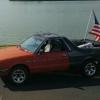
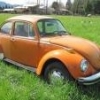
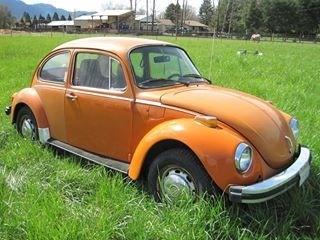
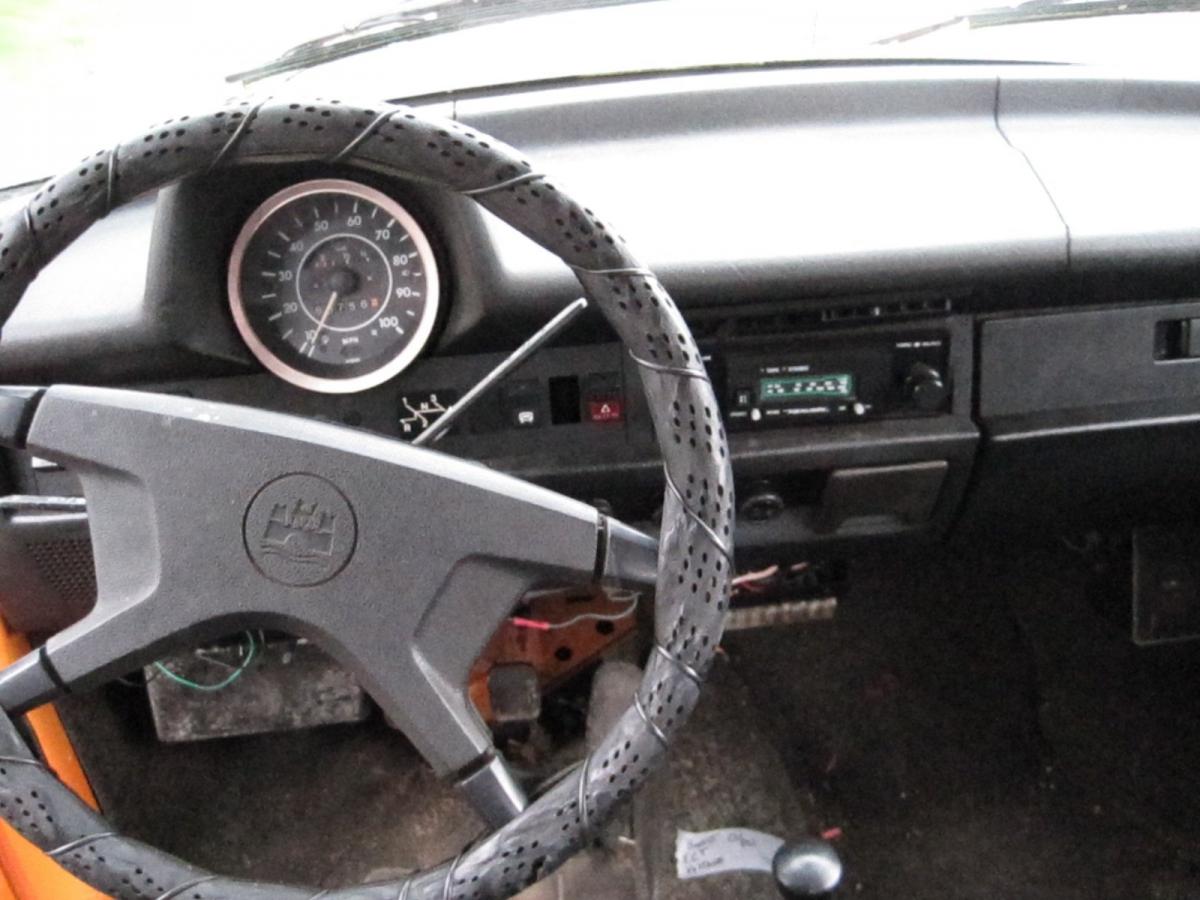
Picked up this straight body 74 Super Beetle a couple years back for the bugaru project.


-
So, I can't get a definitive answer about what i'll need for a crossmember to drop my ej22t into my xt6. I was told an ea82t crossmember would be workable and i've gotten conflicting info there stating that the xt crossmember won't bolt up to the mount holes in the 6... anyone here done the swap before?
-
 After fixing my t-belt, and re-doing my harness for swap into my 87 rx, It will start up perfect and run for about 5 seconds, then stall. If I touch the throttle it stalls. and It will not start at all if I give it any throttle. Theres no codes except when I unplugged some sensors and such to se iff running would change and it doesnt. No new codes if I reset ecu. Im pretty confident in the harness as I've done them before. The thing I look at first is my IACV hose, it's hooked up good and the same as it's always been, I don't have a fuel pressure testor, but i'm assuming it has enough since it pushes through the regulator, I also pinched the return to spike the pressure to the max the fuel pump out puts. I switched ecus, nothing, pulled a plug, looked at spark, it looks good even when it starts stalling. I took an LED and hooked up to an injector plug to kinda moniter the pulse and it looks like good solid blinks until it starts stalling, it faints to very light blinks like it's leaning it. If I crack the throttle the blinks goes almost non-existent so it appears that it is stalling because the injectors are leaning fuel until it stalls?? I tried reading the plugs, but it's kinda difficult since it wont run long enough. As much as I dislike this I used some starting fluid and It kept it running for a lot longer too. I also played with the IACV with the top off and turned by hand and it stays running just as long when I adjust it by hand Unplugging the MAF connector makes NO difference either
 -
 So I just recently raised my Legacy onto Outback Suspension and put 27' General Grabber AT2's on her. I've noticed a HUGE loss of power, which I expected. With a tired out EJ22 I know its time for an engine swap in the short future. My question is, What are my options? I dont want a EJ25 because of the common HG problems. Would a 3.0 out of an H6 Outback work? I'm open to just about anything, but I wanna try to keep it subaru.
 -
I've been searching and searching but the only seemingly helpful pics have bad links. Does anyone have pics of a EJ harnes stripped for an EA car? I have a harness from a 99 impreza that was already pulled and nothing is labled, trying to sort it out. Thanks
-
Ok. so I have started back on my RX project again. been really busy with moving and such, she kinda got put on hold. Picked up my new JDM motor and tranny and have slowly been tearing it down to do a re-seal and tighten things up before I drop it in. Pics of my 5-lug swap... Using front end parts from a 99 OBS rear is all XT6. And here is what I have been doing more recently. Not sure if anyone remembers me contemplating dropping a EJ20t into her but atlas I decided not to "settle" for what I didn't really want... SO yeh. here's my new Version 4 JDM EJ20 Sti and tranny... Motor came pretty well complete and I got a smoking deal on it! included the TMIC,harness ecu, turbo timer, and Syms racing Downpipe and header! Now, I could have dropped this motor in and head it running by now but I convinced myself to tear it down and do a complete re-seal of the entire thing. And since im doing that I might as well to the head gaskets and port the heads and intake while im in there. also ordered up a set of ARP head studs. Also powder coating a few things while I have it apart. I'm going to be powder coating everything I can on this guy to keep it looking clean for years to come. ill post more pics of stuff like that as they happen. lots of cleaning left to do, still need to port the heads and intake, waiting for gaskets to arrive (hopefully tomorrow). I've also been getting goodies for this project as funds allow. see such goodies below . B&M Turbo oil cooler. New TMIC next to the JDM IC that came with the motor. Figured I had room for a larger one so.. Why not! New silicone turbo inlet tube and New TMIC Y pipe. Stage 3 6-puck ceramic clutch and 12lb flywheel. should give me nice fast revs! also considering going with a lightened under drive pulley kit. New GFB response BOV. fully adjustable atmo/resirc! So, that's my progress thus far. As I said as funds allow I will be doing more work to it. should be running before to much longer and I will keep everyone posted as things happen.
-
 Hi, I have an 08 STI and I am not digging the fog light set up one the front bumper and was wondering if anyone has or knows if its possible to fit a newer front bumper on the car with the updated fog lights.
 -
Closed thanks for all the ideas and help
-
 Recently purchase a JDM EJ25D on ebay. I've made the necessary intake manifold swap, and have also discovered that there are differences in the water pump, timing covers, and A/C mounting bracket. Only one thing (right now) is holding up putting the motor back into the car. The EGR pip rises from rear of the head on the drivers side up to the EGR valve on the intake manifold. The JDM has the port, and it is tapped with the same thread as the USDM head, but the bottom of the hole is different. Here is an image of the JDM port: And here is the same port on the USDM head: As you can see, the bottom of the port on the JDM head has a tiny hole in the center, while on the USDM head, the port is wide open. I don't know whether this difference is due to the market, or the model year, but I would like to know if I can open up the bottom of the port on the JDM engine. If so, how should it be done? I have the exhaust removed from the engine right now, so i can look up through the exhaust port and see that pinhole. Would it be better to drill it out, or try tapping it out with a punch? Any help will be much appreciated! Thanks in advance.
 -
hey guys lookin for a lil advice here. workin on startin an ej22 swap into my 88 gl and am wondering if the original single row radiator will provide sufficient cooling or if its better to go with a 2 row that would require some modification to move the original mounting holes on the car to fit the different radiator? thanks guys, Ryan
-
 I am working on a friends 1992 Subaru legacy and she was given a 1.8 motor from an impreza because her engine was blow, my question is can I just swap the engine harness and have everything be ok? will it run? will it run bad? will it pass Colorado State Emission Laws?
 -
 I have a 1991 loyale that has little rust on the body, new fuel pump, water pump, winter and summer tires. needs a rack and pinion at some point but otherwise great little car. One of the timing belts broke and i suspect while fixing I some how bunged up a valve or i guess it may have happened when the belt went. Engine wont crank past 340ish degrees. Have yet to take the covers off to check. I plan on going through the steps again to do the belts if everything looks alright. Curious to know if swapping out the engine is worth it and can I put in something that is more current with more power. not ready to give up on it as I really enjoy driving it. Also , suggestions on where to get a used but good motor. Im in the edmonton, alberta, canada area.I havent done too much in the way of car mechanics but do enjoy it and can follow a manual. Any suggestions or comments are greatly appreciated. thanks guys.
 -
 Hey all, The title is incorrect. It should read "cannont turn Counterclockwise"... I have been working on my swap (1993 EJ22 into 1992 Loyale), and have run into a disheartening problem. I had a hard time getting the motor to line up while putting it in. So, what I did was loosen the clutch pressure plate (PP) bolts. Motor went in with no problems. This is where my stomach kind of dropped.... I put a socket wrench on the crank bolt in order to turn the flywheel so that I could tighten the PP bolts. Well, I made it about 1/4 revolution (counterclock-wise) before it siezed. Tried a little extra pressure, but I'm pretty sure It'll just undo the crank bolt that I've already torqued... I can turn the crank clockwise with ease. There is one point at which it feels like it drags on something slightly, but it'll still turn (clockwise). The only thing significant that I did to the motor, was recondition the heads, and replace gaskets. Do I need to pull the motor back out? Why can I turn it one way, but not the other?? Thanks, Greg
 -
 Hey folks! I'm trying to get my 300$ wagon on the road to be my new daily so I can work on my brat. But we burned up the transmission hauling it home when I got it. It only needed a jump when we got it home for the motor to start and the motor sounds SOLID! But now it only shifts between 1st and 2nd gear. Here's where the good news starts. My buddy swapped a SVX transmission which had previously been swapped with a legacy transmission. So we have one slipping trans, but with a working pump. He had ordered a low mile trans, and it had a bad pump so he got another low miles one and left the first here. So we have a second transmission with low miles but a bad pump. I took the two to a transmission shop and had them swap the pumps. And rebuild the torque converters. And instead of 1200$ for a rebuild I'm walking out with a (hopefully) working tranny for just $375. My only question is, does anyone have any tips to help me out with the swap? It's going to be my first time installing a transmission myself and I'm hoping to get it done in a single day.
 -
First, let me Tell you that I think that such Swap Really is a Bad Idea; but since I've "Been There, Done That" and lots of USMB Members have asked about that via PM to me, I Decided to do this Writeup for an Overall experience Reference. Lets Begin with a brief introduction history: My Subaru Relation Started Long Time Ago... it is a Long Story that I Already had Told here in the Past Years, but Long story Short: My Dad Purchased in 1985 (when I was Child) a White Subaru Loyale Wagon EA82 Almost new (Came Running from the Dealer in California USA, to Honduras) It ran Good for the First five Years, but then the Smog Stuff (Cathalytic converters, etc) got poisoned with the Leaded Gasoline (Here, Unleaded gasoline became available until 1994) so we Removed the Cathalytics, the Carbon Canister, solenoids, hoses and everything related, even the EGR and ASV ... Now it has a Great Weber Carb, H.I.D. Lights, plus many many more Upgrades and actually is my "Everyday Warrior" renamed as "BumbleBeast". Then in 1998 a Dad's Friend who had another EA82 Wagon, that was Light Grey with minor rust in the Back of the Body, (His Garage was Short) but a dead Engine, (Ran out of Oil) was in troubles due to the Hurricane Mitch's Damages that almost destroyed my country; so my dad Purchased that grey wagon with the idea to make it a Spare Parts Car for our White Wagon, and by the Way, help his Friend with some Money... Then, in year 2000 we came across with someone who got his XT6 Horribly Crashed in the back by a Bus and was parting it out... (there are Very Few XT6's in my Li'l Country) ...we obtained its engine and then the Story Begun. To Swap ER27 engine from the XT6 on a loyale takes too much work, time and effort; also needs to be very Creative because it needed a whole Lot of things to be modified and/or created (Built). The ER27 Looks like a EA82 with an extra pair of Cylinders, but is Somehow Odd: The 2.7 does NOT have 6 exhaust ports like the SVX... it throws the exhaust like This: Two cylinders into one Port and the other Cylinder has one by itself on each side, makin' it to Sound like an Old Porsche. Also The 2.7 timing belts are wider than the 1.8 ones. Dad and I (plus few other Helping Friends) During the year 2000, did Swapped the ER27 engine from the XT6 into the former grey "Parts Car" and it Became the Project "Loyale 2.7" the Turbo was only a Future Plan that we Had. (That's the origin of my User name) I Painted in Dark Yellow That grey Wagon (with the ER27 engine) and became my "Weekend Warrior" and since that Swap (Year 2000) I've obtained Lots of Answers to my Subaru questions online here, in USMB; I signed up in january 2001, So even the USMB friends helped out to build that monster. Thank You! The ER27 engine Bolts to the EA82 Gearbox, we just used the ER27 Flywheel (which is Light weighted, compared to the EA82 one) but keeping the EA82 Clutch's pressure plate & Disc. The main Problems are: 1. The ER27 is Huge and it only fit on the engine bay Without the A/C condenser, Radiator & Fans; so the Radiator must be Relocated. Also you need to place a (Black) plastic or metallic barrier behind the Front Grille to avoid little Rocks to reach the Spinning engine's belts / timing belts. You'll need to be a Lot inventive to solve the Radiator problem. I did a Pair of Small Radiators interconnected, with twin fans, which Never were enough for the ER27. Other USMB Members who have done the ER27 Swap, done it with a (4"?) Lift to the Body, so the engine Lowers by dropping the Crossmember, letting a Horizontal Radiator + Fan Mounted in the Hood, with Hood Scoop & Vents; so the Radiator goes in the Top of the Engine, somehow. 2. The ER27 engine holds itself to the Front, so you must fabricate a Metallic "Arm" to place the front engine mount. 3. The ER27 is Heavy weighted and the Extended extra weight to the Front does the wagon a Li'l Saggy and could be unstable (makes the Wagon to Underbrake & Understeer) under certain situations at Higher Speeds. I Used the Front Struts from a 4WD Model (Mine was 2WD, the 4WD ones are a Li'l bit Taller) and used Ford Tempo's front Coil Springs in the front of my Wagon, that helped to keep it on level... in fact, leveling that 2.7 wagon was how I invented all the Suspension mods, that you can Read as complete Write-up, with photos, here: ~► http://www.ultimatesubaru.org/forum/topic/106807-improved-shock-absorbers-and-spring-coils-on-loyales/ 4. You'll Need to Swap the XT6's ECU and Wire Harness. 5. Many things need to be Modified, like the Engine's Crossmember, Power Steering Pump Retrofit, (The one on the XT6 is electronic & Variable) Custom "Y" Pipe, Fuel Pump Upgrade, etc... The Turbo is doable, it has been Done an ER27T and even an ER27SC ... I saw it on www.xt6.net, also you can find more information and photos, here: ~► http://subaruxt.com/old/Pumped.htm ~► http://subaruxt.com/old/under_pressure.htm But since our ER27 Wagon had some Problems with overheating and Underbraking, we decided to leave it alone until we Solve the Radiator and Handling Problems First ... ... so, No Turbo. My Dad used to drive that Yellow ER27 Wagon "Weekend Warrior" at our Hometown, while I use to drive as my "Everyday Warrior" the White Weberized EA82 Wagon, 'cos I live so Far Away home due to my Job. My ER27 (XT6) Wagon Lasted a Decade, Now is Crashed and Dead. More info here: ~► http://www.ultimatesubaru.org/forum/topic/113641-could-this-be-the-end-of-my-27-project/ After we Lost the Dark Yellow 2.7 wagon, I painted my former white wagon in Lighter Yellow with Black Stripes, and became the "BumbleBeast" (More information and photos following the Link that is on my Signature) That ER27 wagon was always some sort of "Still in Development, Project Car", always unfinished, (mainly Due to the lack of Money and time, you know... ) But it was fully Driveable and it ran great and Nice at Regular Speeds, but if you Drive Faster \ Loaded / in many Uphills, the ER27 engine Overheated easily with those small Radiators ... ... maybe the best idea for such a Retrofit of an ER27 engine onto a Wagon, is This: To swap the whole front clip from the XT6 to the Wagon. Now I Know that an ER27 engine doesn't make "Faster" a Loyale, Like an EJ Engine could do, due to the Extra Weight to Horsepower Ratio... So I really Don't think that an ER27 engine is good idea for a Loyale, due to the troubles of the extra weight going to the Front -brakes and suspension- many adaptations -Lots of Patience, fabrications, time and effort- and the null space that remains in the front of the engine's bay -The radiator does not fit and it is difficult to repair or replace the front of the Engine's Parts- and other issues, Like Losing A/C, plus tires wear faster... So, instead of that ER27, a Lightweight LADM Specs EJ engine is better idea. Those Fit Better, Makes the Radiator and everything fits like Stock; also their Power is just Around the ER27 or even Better ... Plus Easy Service to their Front Parts and no "TOD" noise! ... ... I like the Strong & Durable Subaru EJ22 with LADM (Latin American Domestic Market) specs. Those EJ22 did came to Latin America (LADM) with stock Distributor & Carburetor, If I could go back in time... I think that the Subaru EJ Engine is the right way to improve a Loyale, I Hope This information will Help you; please excuse my frankness. If you find this information, useful, let me know by hitting the "Like" button. Kind Regards.
-
- 4
-

-
- JesZeK
- Engine Swap
- (and 5 more)
-
In This Writeup: ► Understanding How a Relay Works. ► Knowing which Wire is for, at the Round Relays. ► How to Swap the Old Worn Relays with Newer, more Capable ones. ► Finding the Location of the Relays on a Subaru EA82 (Third Gen Leone / Loyale) ► Learning to Wire New Relays if Desired... in case you wanna Run Halogens, Bigger Horns, etc... ___________________________________________________________________________________________________ First of All: I Hope this Write Up will Help anyone with Electrical Problems due to bad Relays, Such as Power Windows, Air Conditioneer, HeadLamps, Halogens ...etc... also you'll learn how a Relay Works and How to Easily Wire New Relays. You Know that when you Switch Almost Anything Electric in your any car There is a Relay Takin' the Main Job of Sending the Power to the Accesory you Switched On; the Switch that you Touch or Handle, is just a "Remote Control Signal Sender" to those Relays. Very Long Long Time Ago, I had Problems with my Subarus' Electric Powered Windows, and then Long time ago with the Air Conditioneer too, I Found that the Fault of Slow Workin' / Non Workin' Power Windows was due to a Bad Relay; Also The good ol' subies had A/C Engaging & keep workin' Compressor Problems. An Easy Fix Would be to Just Change the Round Original 22 Amps Relay, But Those Relays aren't Easy to Find, They Need the Whole 12V Power to engage Properly, they are Expensive, and they are only 22 Amps Rated ... ... Beside that at this point of the wirings' life, their Sockets (Plugs) Could be burnt too... In my Own humble opinion, the Best Solution of All is to Swap There Bosch Standard Relays. I've Done it to the Main A/C Relay, the Two Auxiliary A/C Relays, the Power Windows' Relay, and the two HeadLamps Relays. I'll Explain How To do that swap Here, with Photos. Bosch Standard Relays comes in Many Quality Brands, Not Only Bosch (By the way, I Saw Bosch's Made in Portugal, Germany and Brazil, rated at different Amps) There are many Other Brands that Make the Bosch Standard relays, like Hella, Wagner, Flösser, Osram, Sylvania, Potter & Brumfield ... etc ... so They are Easy to Find, They are Cheaper than stock round relays, and Give Better / Faster Response; they just need as Little as 8 Volts to Engage, also Bosch Standards are more Reliable, and are Rated from 30 Amps to 40 Amps, so They'll Last Longer too ... ... Warning! - Please Forget about Cheapo bad quality relays. In Example, This is a photo of a "Potter & Blumfield" 40 Amps Relay, Made in USA, The one that I've Swaped in, instead the Main A/C Relay Under the DashBoard: But to Swap a Bosch Standard Relay in your Subie, You'll Need to Cut off the Subie's Plug and Weld there a Bosch Standard Plug ... Or use an Adaptor. I'll Explain How to do That Too, is Easier than you Could Imagine, but keep Readin' Carefully, and Do Not Forget to Remove one of the Battery Terminals prior to Start Cutting / Welding any Wire. Please: Be Careful While doing this, follow this instructions at your own Risk. The Plugs' Swap is needed to be Done just once for each Relay Unit; then in the Future if you Need to Change any Bosch Standard Relay, the Plug Stays, you only Need to Pull the old Relay from it, and put there a Fresh New Relay; and That's it!
- 6 replies
-
- 2
-
-
- Fix
- Electricity
- (and 8 more)
-
Ideas on Swapping a Weber Carburetor on a Subaru EA82 Engine In this Writeup you'll find The Basics: ► A complete installation Guide. ► Solving problems untold by the Manuals. ► Jetting for the EA82 to be used between Sea Level and ~ 6500 Feet (2000 Mts) Altitude. ► Proper routing for the P.C.V. (Positive Crankcase Ventilation) System's Hoses. The Advanced: ► A much better Adapter Plate than the one designed for the EA82. ► What to do with the ASV, EGR, etc... The Optional: ► Installing an Oil Catch Can on the P.C.V. System. ► Distributor's Advance Modifications. ► intake Manifold Modifications. ► ignition Coil upgrade. ► Exhaust Piping Modifications. ► ...and Much More! Pay attention to the "Important Notes" Introduction: On early 2006 I Swapped a progressive Weber 32/36 Carburetor on my 1985 Subaru White Wagon (which isn't white anymore),, that swap job required more things to be done than what the Manual included with the kit, stated; so I'll explain here everything that is needed to successfully do the Swap, and I will add Photos describing all the problems I faced and the ideas I had to solve them; Hoping that this writeup will Help you to Swap a Weber carburetor on an EA82 Subaru engine, flawlessly. Many of the Ideas that I explain here, are also aplicable to the older Subaru EA81 engine as well, basically talking, almost everything except the adapter plate. REMEMBER: Use this Ideas at your Own Risk! First of All: the Redline-Weber K-731 Kit, which is designed to install a Weber carburetor on the Subaru EA82 carbureted Engines, came with the following items: A Progressive Weber 32/36 Carburetor, an Air Filter Box plus its element, a Throttle Cable Bracket, some Gaskets and a two plate Adapter, which consists on one Lower plate designed to be mounted directly to the intake manifold, and one Upper plate, designed to be mounted over said Lower plate; this last one receives the studs which are intended to Hold the Weber Carburetor in place; and needs the Gaskets inbetween ... Also this kit, comes with a bag with different screws and the studs. All the Weber carburetors that are Sold in the USA, comes with a sticker with a Statement that says something like: "For Racing -or Offroading- Purposes Only" due to Smog, pollution and other Legal Regulations which varies from State to State, so They're Not "Street Legal" on certain areas and that statement shall be placed on all brand new Weber Carburetors, due to said Legal Regulations; so you must be sure that you are legally allowed to do this Swap on the Area where you Live, prior to start. Determining which type of Weber carburetor you do Need There are many different Weber Carburetors' Designs on the market, however the two models used more often on Subaru Engines, are those who features two Barrels. (Forget about using a single barrel carburetor on these Subaru engines, simply it doesn't worth the effort.) Basically talking, there are two variations of the two barrel design on Weber Carburetors, that works good with these Subaru engines, one design is known as the Progressive Models (being the most popular, the 32/36 DEGV) and the other design is known as the Synchronous Models (being the most popular, the 38/38 DGAS). Each of the two barrels, has its own butterfly that opens / closes according to the Throttle position; if you want to be Sure which model you do have, just take a look at the Linkage that opens the butterflies between both Barrels, it is located behind the throttle plate: If Both Butterflies on both barrels, opens at the same time, always when the throttle position moves, it is a Synchronous Weber (like the 38/38 DGAS); But if one barrel's butterfly starts to open only after the other one have already reached the half way open, then it is a Progressive Weber. (like the 32/36 DEGV). The Synchronous Webers, like the 38/38, are used mainly for Racing purposes due to the Higher Fuel usage (Both identical barrels works / opens at the Same Time, all the time), and thus means that if you use a Car with such kind of carburetor as daily driver / commuter, it will become a Gas guzzler. The Progressive Webers, like the 32/36, are used for all mixed driving needs, as you commute using only one barrel which is known as the Primary -Low- Stage (usually with a Smaller Jetting); and the other barrel, which is known as the Secondary -High- Stage (usually with a Bigger Jetting) is only in use during deep accelerations, so you have the Best Balance between Power and Fuel Consumption. I chose a Progressive 32/36 Weber carburetor, which is, in my own humble opinion, the best option in Carburetor that you can choose for this retrofitting job; however this writeup is still applicable, if you have a synchronous Weber. That been said, lets Begin to explain the Problems I Faced during the Swap Job, and How I Solved them. ~► First Problem: The Lousy Adapter Plate. As I stated above, the K-731 kit that I obtained from Redline Weber, came with a Lousy Adapter, conformed by two separate Plates, Lower plate and Upper plate, each one has its own flaws ... ... The Lower Plate needs four screws to be Held properly in place, directly bolted to the intake manifold; each screw has a cone shaped, flat top head, whose angle is approximately 60° and is designed to fit on the also cone-shaped seats of the plate's openings; the matching angles holds that plate in place. Then comes the Upper plate, which goes directly bolted to the Lower plate; finally, the Weber carburetor mounts on that Upper Plate. The Flaws of the two-Plate adapter: While the weak thin walls on the threaded openings for the Studs, is the main flaw on the Upper plate, (Look for further information and photos regarding the Upper plate, on the following post of this writeup); the way to bolt the Lower plate to the intake, is another flaw, let me explain: The Redline-Weber K-731 kit came with two different sets of screws provided to bolt the Lower Plate of the adapter, to the intake manifold; one set of four silver screws, comes with the appropriate size and pitch for the Subaru EA82 intake manifold's threads (6 mm ~ 1/4"), but the heads of those thin screws are very small, around the half size of the cone shaped seats on the lower adapter plate. The other set of four black Screws provided, are thicker (8 mm ~ 5/16") and their heads fills completely the cone shaped seats on the lower adapter plate; but their thread and pitch are big and do not fit on the intake manifold's threads. Here you can see a comparison photo, of one of the silver 6 mm screws (I call it "Subaru Standard" screw) provided, next to one of the black 8 mm screws (I call it "Weber Special" screw) provided, for the same Lower plate: (sorry for my Cheapo Cellphone's camera photo) It is impossible to bolt in a ►"safe"◄ way, the Lower plate to the intake Manifold using the thinner 6 mm screws provided; but I bet that they included both sets, in order to let the unexperienced or Lazy mechanics / owners, to swap the carb fast and easy. Those tiny silver screws will make the first plate to get Loose, developing vacuum leaks sooner or later, because their small size, makes the screws to have enough room inside the plate's opening, to move and slowly unscrew, from the engine's inherent vibrations; it's only a matter of time. Also the tiny silver screws only covers half of the seat, on the openings of the lower plate, making a weak union. I already faced a vacuum leak: I was unexperienced when I did my first Weber swap, years ago, and I used the tiny silver screws as they matched the threaded openings on the intake manifold... it developed a Vacuum Leak between the intake and the lower plate, in less than a couple of months, despite that it was bolted tight, using a shellac smeared gasket. After that vacuum leak, I removed the intake manifold to check the install, and then I understood the reason why they put a second set of screws by seeing how loose the Lower plate became with the tiny silver screws... I decided to use the Bigger diameter black Screws, instead. In the Photo Below, you can see how the Heads of the silver 6 mm (~1/4") screws, doesn't fit properly on the cone shaped seats of the lower plate adaptor; they only covers the half from the cone seat and their heads doesn't fill completely the space of the opening in that plate. Next to it, you can see how the Heads of the black 8 mm (~5/16") screws, really fits perfectly there, they sits on the whole cone shaped base, while filling completely the opening, giving a much safer flush mount, which prevents the screws from getting loose with time and vibrations, as they doesn't have space for moving, because the Upper plate will be placed over them. So, some modifying job to the intake manifold is required for sure, if you want reliabilty: to drill and tap it, re-threading the intake manifold's threads to match the size of the bigger black screws provided, in order to use them to bolt the Lower plate properly, and firmly in place. To make those Bigger diameter black screws to fit, You will need to Drill and tap new Bigger Threads to the intake manifold, but Be Careful when doing that: The intake manifold is also a coolant crossover, so you must take the proper depth measurements to avoid drilling onto a water passage. I Kindly Suggest you to remove the whole intake manifold from the Engine, prior to do the rethreading. Here you can see how the intake Manifold originally was, right after removing the old Craptachi carb and gasket, just before removing it from the Engine: I took off the whole intake manifold to Drill the New Oversized Threads From 6 mm (~ 1/4") to about 8 mm (~ 5/16") Also I Sent the intake manifold to a Machine shop, to polish the flatness of the Carb's base: Here, you can see how the Bigger black screws Now fits perfectly there: Then, I Washed clean the intake manifold using Household Detergents, to remove any debris Important note: I kindly suggest you, that the inbetween gaskets should be placed Smeared (the two faces) with a thin layer of Shellac, because shellac is Coolant / Oil \ Gasoline Resistant (more info on Shellac ~►Here) other gasket makers will fail in that place; the idea is to avoid any kind of Vacuum leaks. ~► Second Problem: To Seal the (Now Unused) Water Passage for the Old Craptachi Carb. If this procedure is not done right, the cooling system will spill coolant on the intake manifold, right to the carb's base opening, so be Careful! My first solution was to place the Gasket completely smeared with Shellac over that water opening, and also I cut in half the tiny Hose which supplies coolant for that Passage, and cap closed both ends of said hose, using screws and clamps... That lazy solution worked fine for five years, but you must consider that there is still a coolant flow inside the water crossover of the intake manifold; so there still will be coolant flowing on that Area, even without said hose. You might use Cold Welding Compound such like the 4 minutes "JB Weld" to fill close that opening ... as I wrote, I ran my subie for years with only a Shellac smeared gasket and a removed hose without problems, but that setup was about to Fail after five years. Continue reading, in further posts of this writeup I will show you another Idea which is a definitive and permanent solution for this problem. After placing the Gasket, smeared with Shellac on both sides, inbetween the intake and the first plate, I bolted it there: (Notice the Bigger Screws and how their Heads fills the Plate's openings) Then, the Upper plate went over that first one, Also with a gasket smeared with Shellac on both sides, inbetween: And Then you can place the Weber Carburetor. ~► Third Problem: Power Steering Equiped Models. If your EA82 engined Subaru, has a Power Steering Pump, the Choke's Spring mechanism on the Weber Carb, will hit the Power Steering Pump's reservoir ... ... and even removing the Choke's Spring, the base for the said spring, impacts the bolt's head at the back of the power steering pump. (Here, the Choke spring was already Removed from the Weber Carburetor) At the Caribbean Tropics of Honduras, we don't need the choke too much, so... ► My first solution was to Remove the Choke's Spring, but it wasn't enough: also I had to cut Half of the head from one of the Steering Pump's Rear Bolts, to prevent the Base for said choke's spring from hitting it. ► A second Solution consist in, besides from removing the above mentioned Spring, to Completely Remove its Base from the Carb, along the choke's Butterflies (or choke plates), so you don't need to cut nothing. ► A third solution done by other persons, is to install the Weber Backwards, with the Choke facing the windshield instead to the front; it is doable, but in my own humble opinion, it might lead to another complex set of Problems. You can see photos and read further, in this example: ~► http://www.ultimatesubaru.org/forum/topic/156836-installing-weber-3236-backwards/ ► After lots of Research, I found a fourth and definitive Solution, which is easier than all the others. Continue reading, because in the next posts Nº 2 and 3 of this writeup I'll explain with details this better Solution ... ... which does Not require to modify, to cut nor to remove anything, so you can keep the Weber carburetor with a working Choke on the Models that features Power Steering, as easy and simple as install and go. Hooking properly the Accelerator Cable I installed on the Weber Carb, the throttle's Cable Plate Taken From the old Craptachi carb... ...Plus the part of it that works with the Air Conditioner Accelerator Actuator, which with a simple twist on its metal plate (due to the new carb's different angle) I managed to made it work good. The K-731 kit from Redline-Weber, also includes a Bracket to hold the Accelerator's Cable in Place, you must install it Carefully without Bending it, on the two rear screws that holds the Carburetor, on the Adapter plate; and you'll notice that the Accelerator's Pedal really covers the complete Acceleration Travel on the Weber Carburetor. In case said Bracket is bent Towards the Carburetor, the accelerator's Pedal will never get the Full Acceleration from the Carburetor because the Cable doesn't go Back enough to fully Open the Secondary -High- stage; in that case you'll need to bend it back; but Never do it when it is installed, it could damage the Adapter Plates; so take the Bracket out and bend it there. Once the Bracket is properly set, the accelerator pedal provides full travel for the accelerator on the Weber carburetor. So, the Intake Manifold + the twin Adapter Plates + the 32/36 progressive Weber Carburetor + the accelerator cable's Bracket behind, ended looking in this Way: (Yes: Those are my dirty Hands) Once installed, the EA82 Engine started at the Very First Try and Purred like a Kitten... a Boxer Kitten! ... ... you know. The Weber carb reveals somehow the Hiding potencial of the engine, and the Boxer Rumble Sound of the Carburated EA82's at its Best! ... ... While lets you Clean the crowded engine bay, removing lots of unused smog stuff. It is a Win-Win Deal for sure. I Noticed a Huge Improvement inmediately! ... Summarized in a quicker Engine Response and Faster Acceleration, smoother Idle and a really noticeable Better Low end torque. Fuel Consumption remains close to the Stock Specs ... (if you drive carefully) ... but the Weber swap could make you to want to keep the gas pedal floored ... ... in that case, fuel consumption will increase for sure
- 10 replies
-
- 2
-
-
- Carburetor
- Adapter Plate
- (and 8 more)